1.0 – A Minor Soliloquy
A little tangent, recipe blog style, before we get into the build itself (if you’re pressed for time, skip down to the next header to get going on the build log).
The last time I competed a costume was at ECCC 2016, and after that I was forced to put cosplay on a big backburner for the rest of college if I wanted to finish my degree on time. I graduated and got a job in 2019, and then we all know what happened next, and until last summer, I had a really difficult time finding the motivation to make anything. I floundered through a few projects, but my saving grace was actually some dungarees I made in late summer 2023 (highly recommend the Sasha Starlight pattern) and all the sudden I was flooded with the big build itch.
Now, in the 8 years since last competing, I’ve made a ton of friends, many of whom love it (and they’re really friggen good!), and I think my view on what constitutes a so-called “competition cosplay” got a little… skewed?
Like, the sentence “Oh, I didn’t weave this fabric myself, so the costume’s not competition worthy” is actually something I said.
And October came, and I rewatched the ECCC 2023 competition, and I sat there, and I said to myself, “Wait a gosh darn minute. I’ve done this before, and I can totally do it again.”
And then I didn’t tell anyone. Not even my fiance. Instead, I listened in on friends’ conversations about competing, silently poured over their previous build books, and stewed about how to make a dress come to life.
I told myself that if I could get it wearable by the submission deadline, I’d try out competing again. I wanted to see where I actually measured up – if all the accumulated knowledge in my head put to use actually meant I knew what I was talking about. And, who am I kidding, I’m a pretty competitive person. 15 years of being fairly mediocre at competitive jump rope made me a pretty good loser, but I’m still the kind of person who wants to win in a competition with my fiance on brushing our teeth (and he has no idea he’s competing with me).
After almost a decade of taking a lot of shortcuts to make my costumes as quickly and as sturdily as possible, this meant doing everything right. No slap dash serging, no purchased undergarments, no hiding plain black heels under my gown.
So, here’s a recap of exactly how many corners I didn’t cut (and maybe a couple I did).
1.1 – Design and Overview
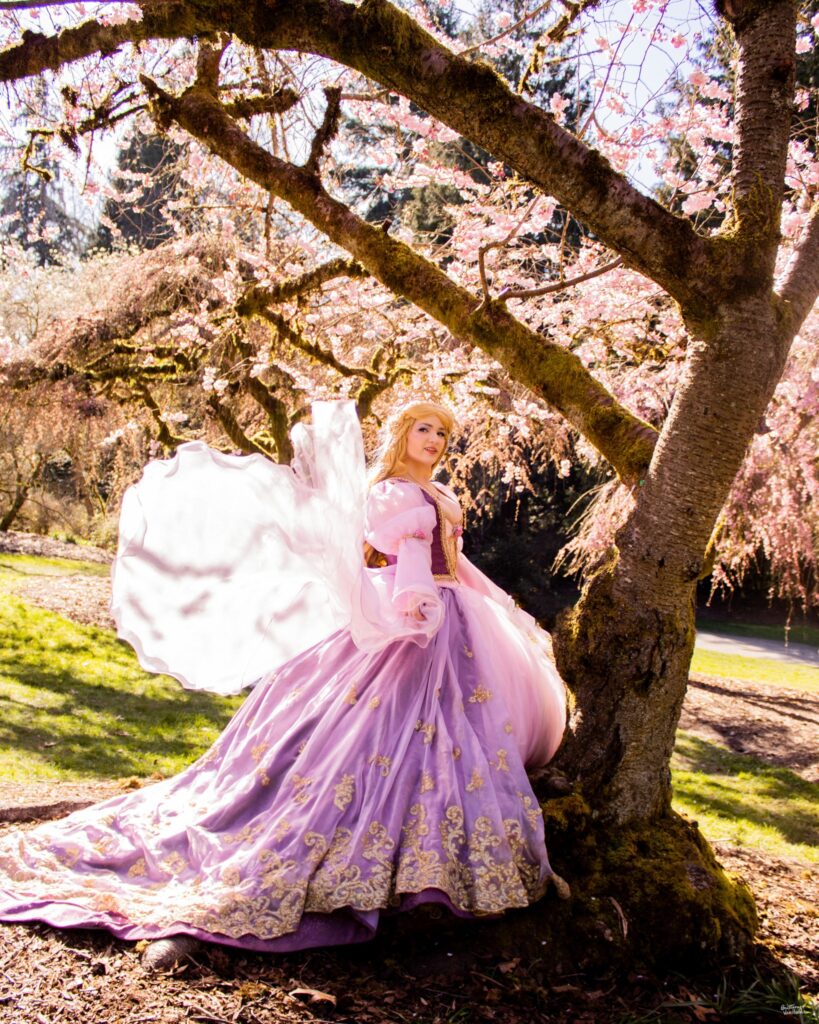
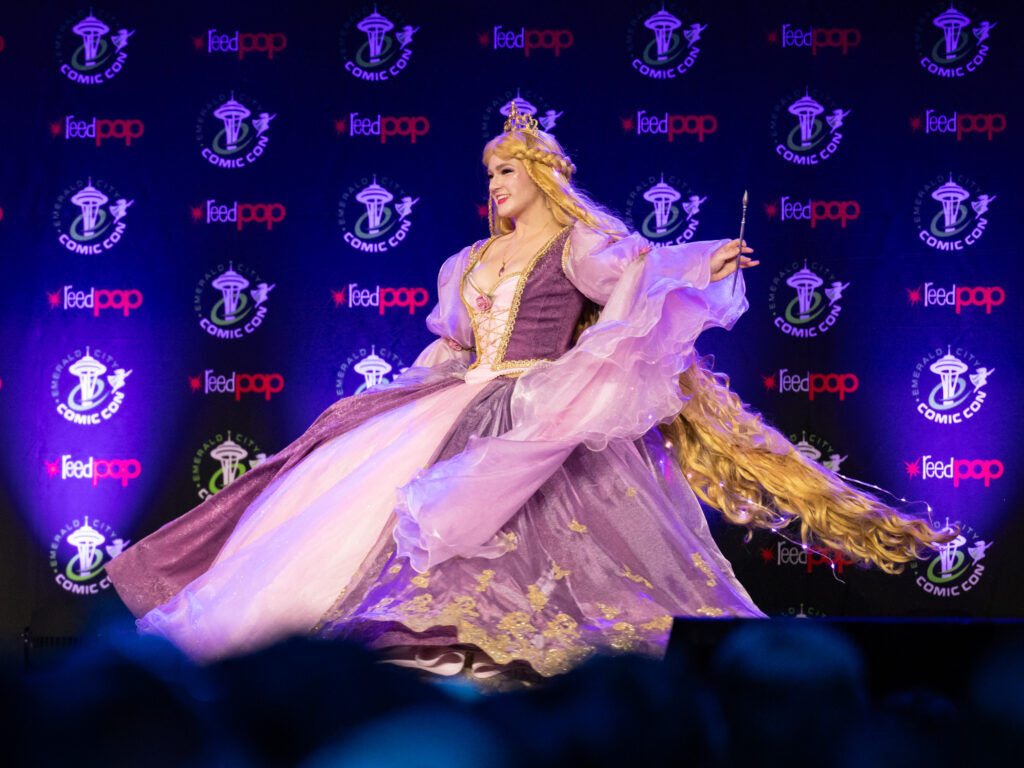
I decided on Barbie Rapunzel in part because I wanted to test out a potential wedding dress silhouette (which ended up very much not being the silhouette I’m going with), but it was mostly because I wore out that movie when I was 5. Not to be, like, a hipster or anything, but I liked Barbie before it was cool.
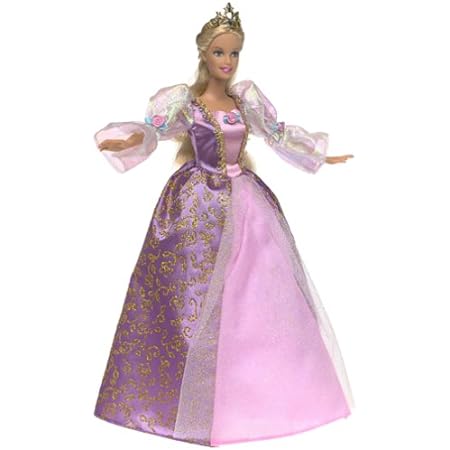
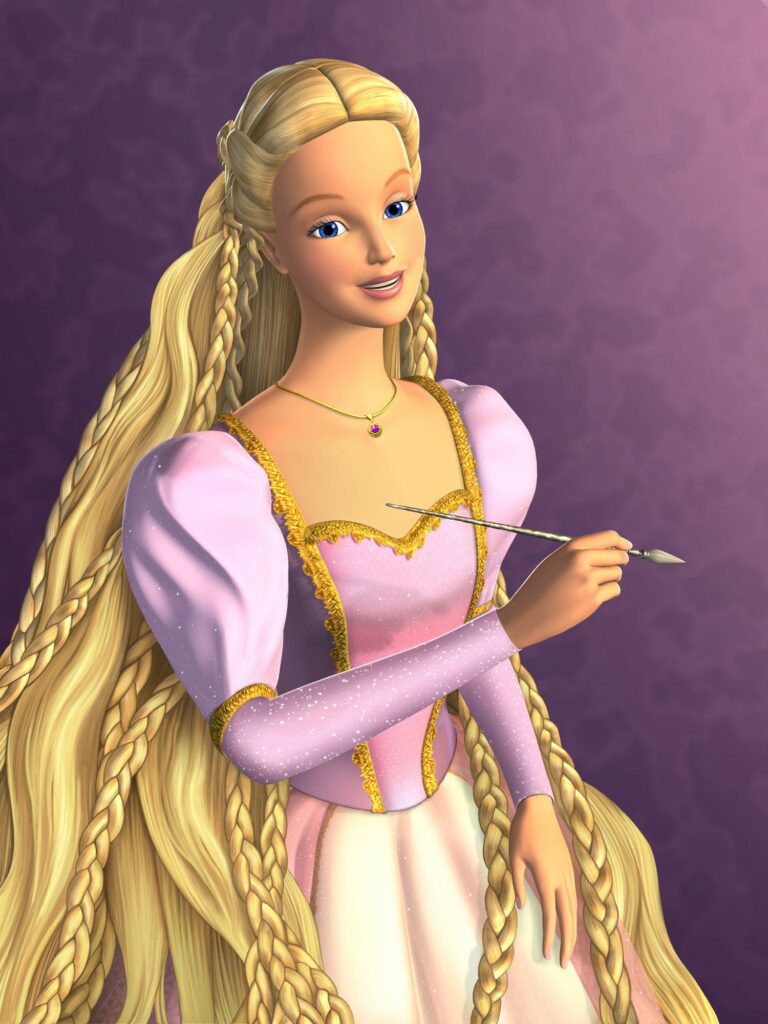
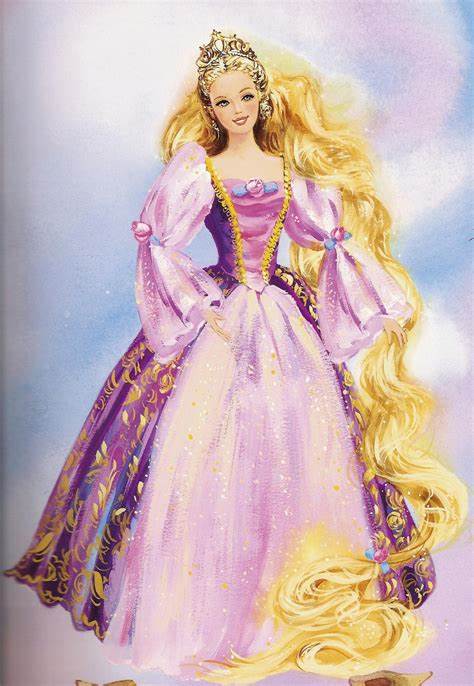
I wanted to combine the three different versions of this dress – concept art, film, and doll, and add my own embellishments to better make the dress come to life. The movie dress had always been a let down to me compared to the gorgeousness that was the VHS cover art, and my favorite dress in the movie is actually the purple and white one she initially sketches out and decides is too plain.
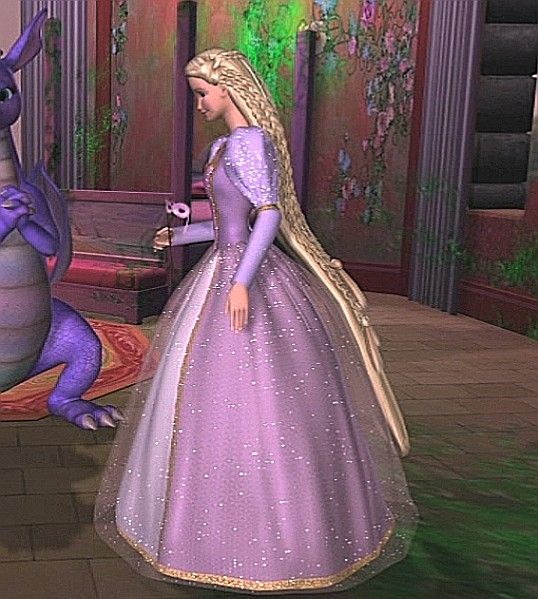
The dress is decidedly fantasy – I debated pushing it into a specific historical decade (I was especially tempted to do an 1830s reimagining), but decided to keep it closer to the source material(s) so I could use all the horrible polyester glitter fabric I wanted.
References gathered, I decided what I liked from each incarnation of her design and sketched it out!
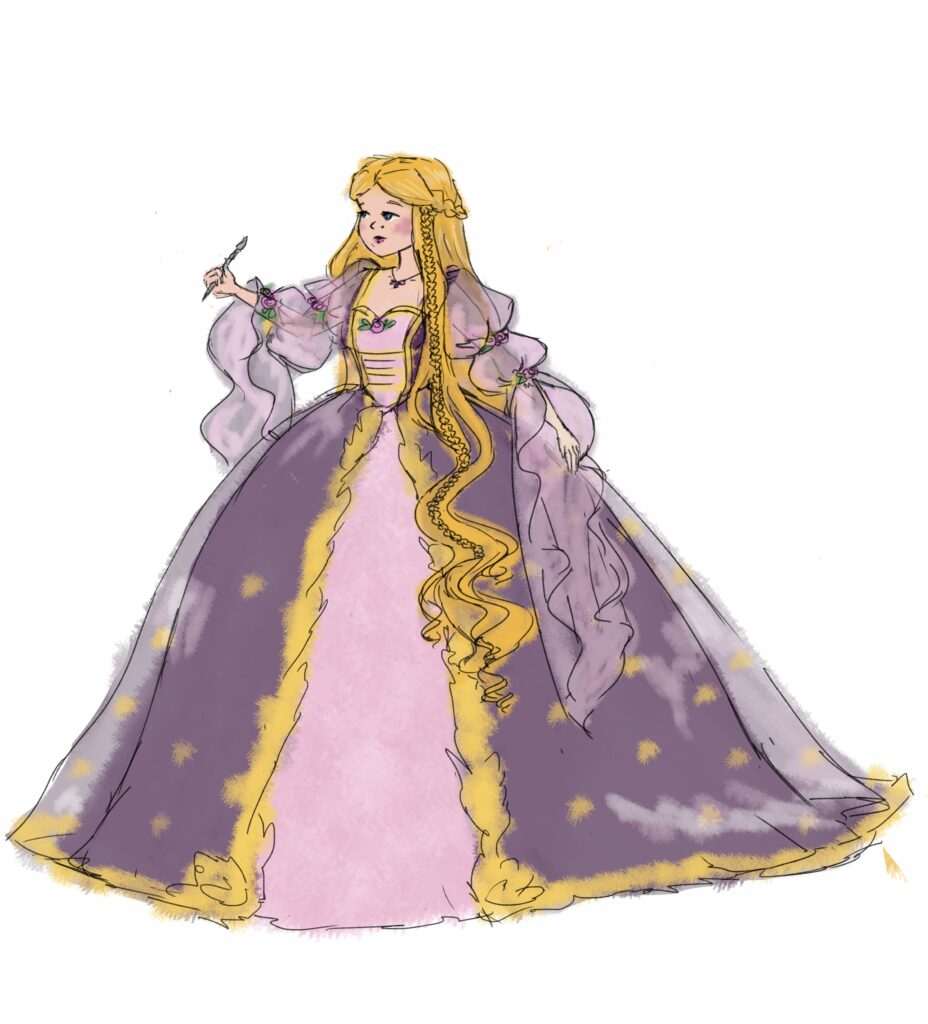
All my college art professors weep at this sketch, but it served its purpose. This ended up being really close to my final product, which always feels good. The only major difference between this sketch and my gown ended up being the number of tiers in the sleeves.
This is not a budget costume, but it is over 60 yards of fabric and 30 yards of trim and was still under $500 out of pocket. Honestly, that might be the aspect of the dress I’m most proud of.
1.2 – Corset
I’ll be working from inside to out for the build log rather than chronologically, so I started with the support corset underneath.
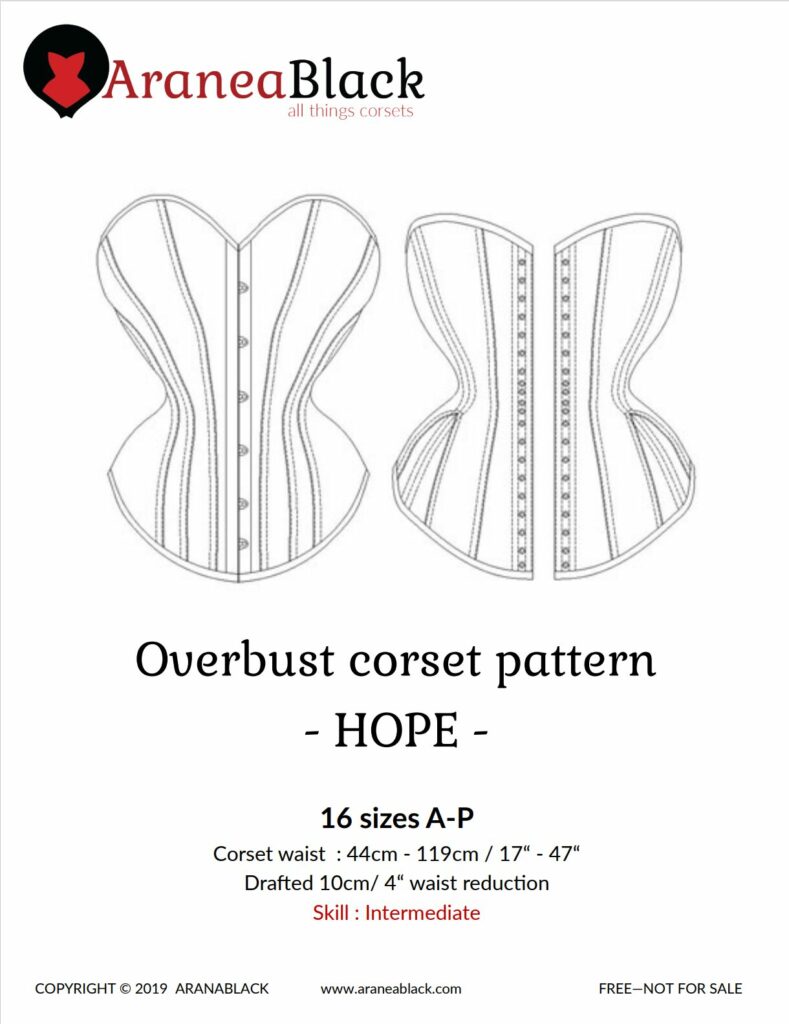
I based this off of Aranea Black’s Hope corset pattern. In my mockups, I adjusted the sizing down a bit, edited out the front busk and gores, and shortened the entire garment several inches. I didn’t know exactly how long I wanted the corset (waffled between an underbust and an overbust for weeks), so I couldn’t order an appropriate length busk, and the smooth front corset is a look I prefer anyways.
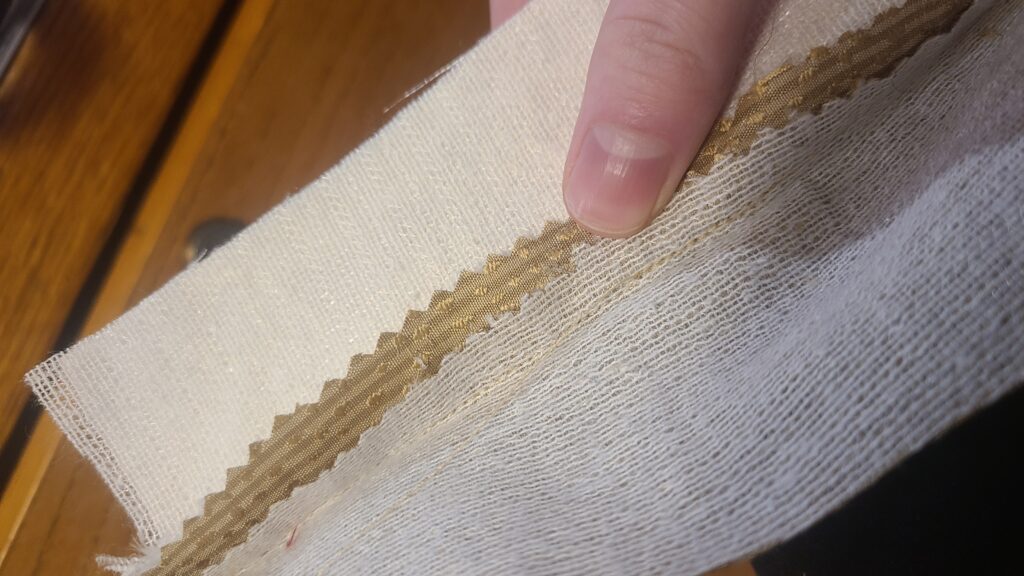
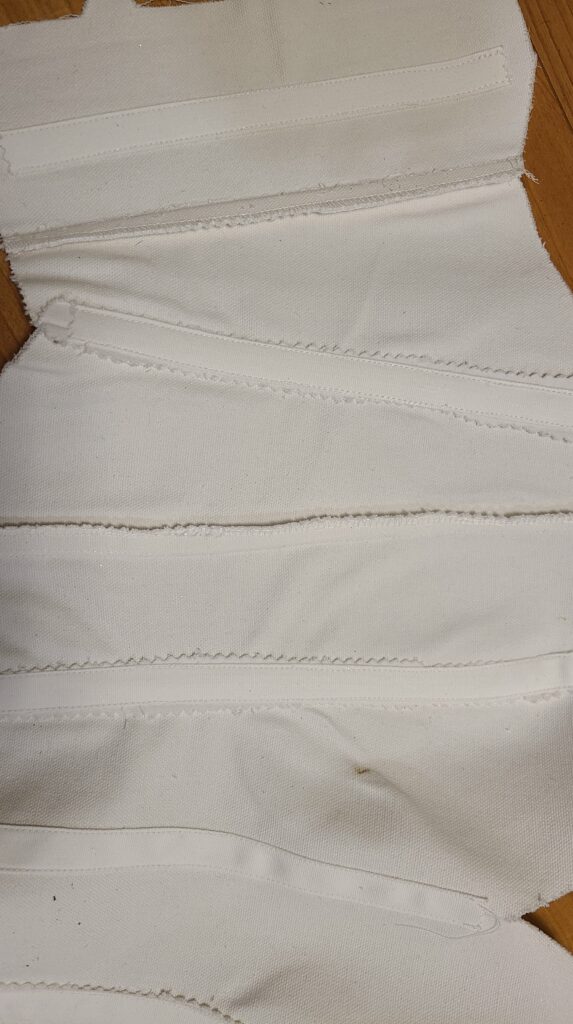
Once the mockups were sufficient, I cut the final fabrics – a cream brocade I got in a fabric swap I did with my friends, and leftover gold silk from my historical Rapunzel Cranach gown back in 2018. I interfaced the fabrics for extra strength, and the corset came together really quickly.
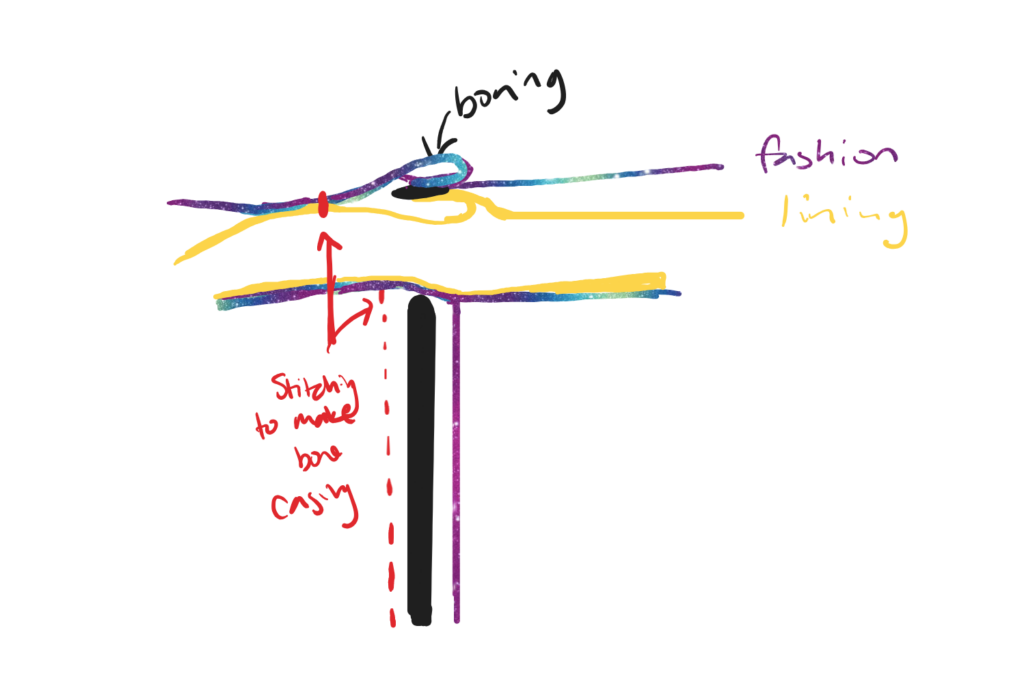
I used double welted seams, a first but new favorite for me, which come together really quickly but are really difficult to alter sizing on, so I was really glad I did two mockups. Someone please correct me if I’m saying the wrong seam type – I just went back in to try to find a diagram on how the seams work, and I’m not sure double welting is actually what they are, but I couldn’t find a better term. Hopefully my little doodle is clear, but the lining and fashion layers are sewn at the same time, on top of each other, and then the next piece over is unfolded like you’re turning a page, and another seam is made down the two to create the boning channel. You work from the center out to the back with this method.
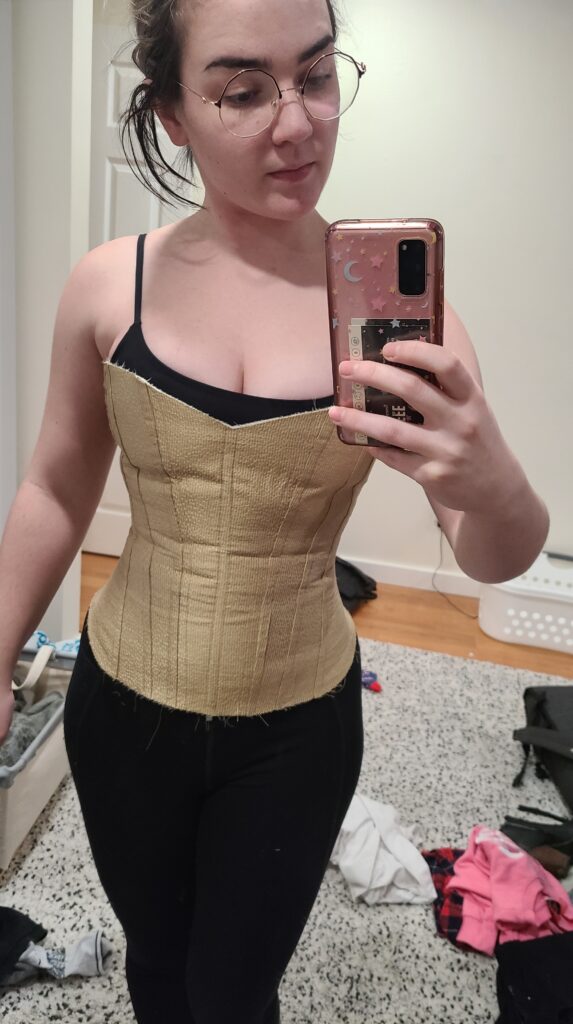
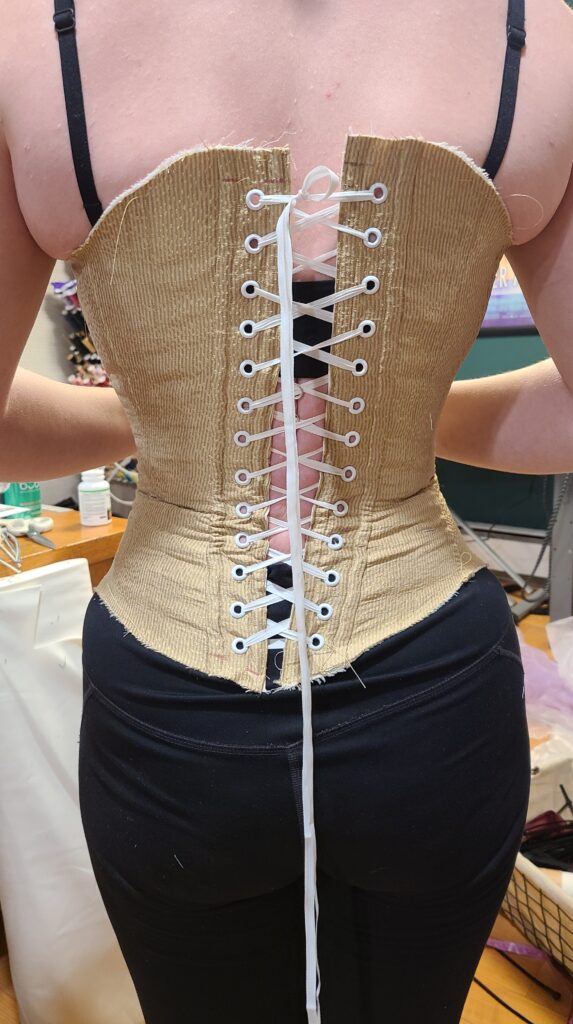
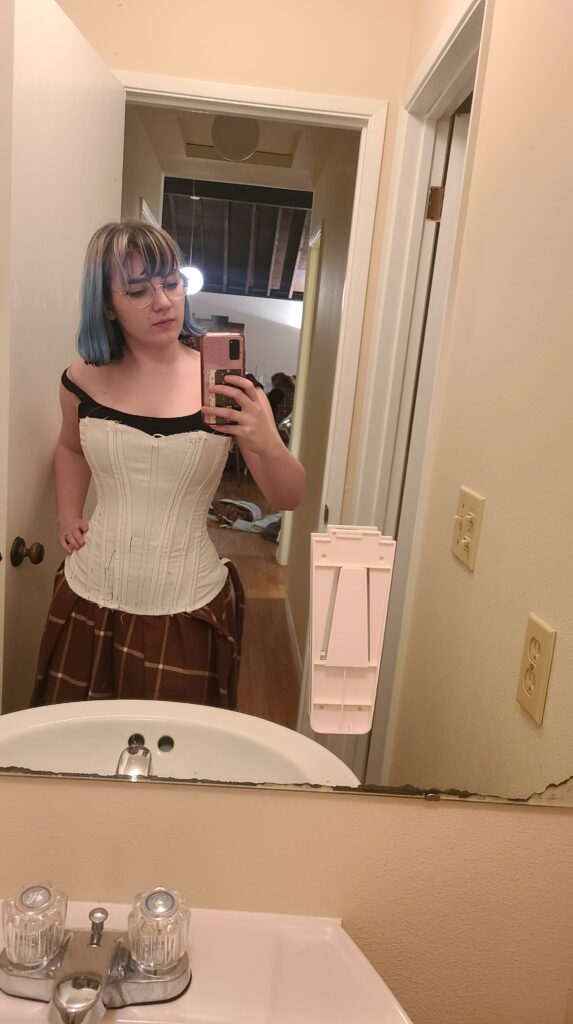
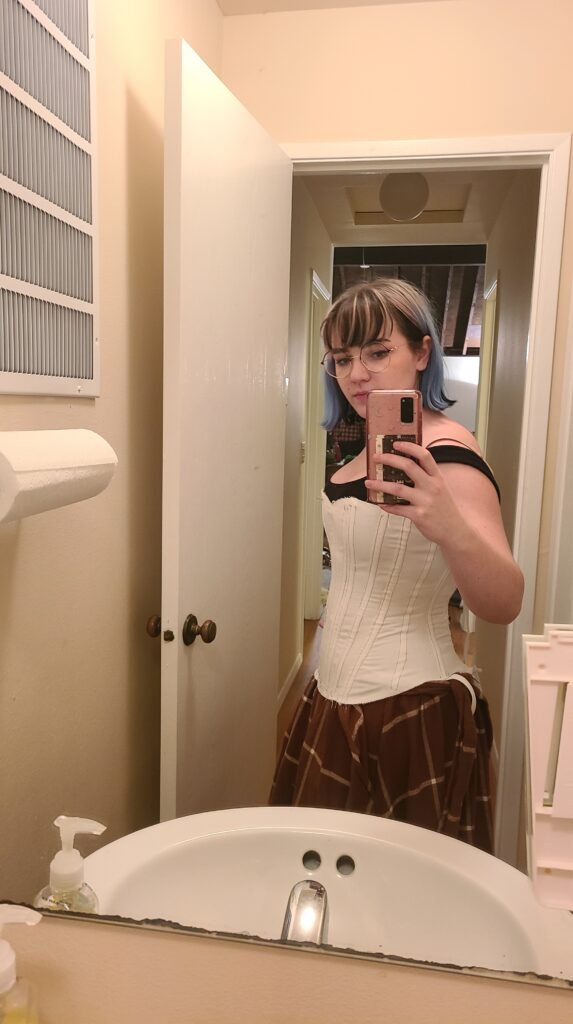
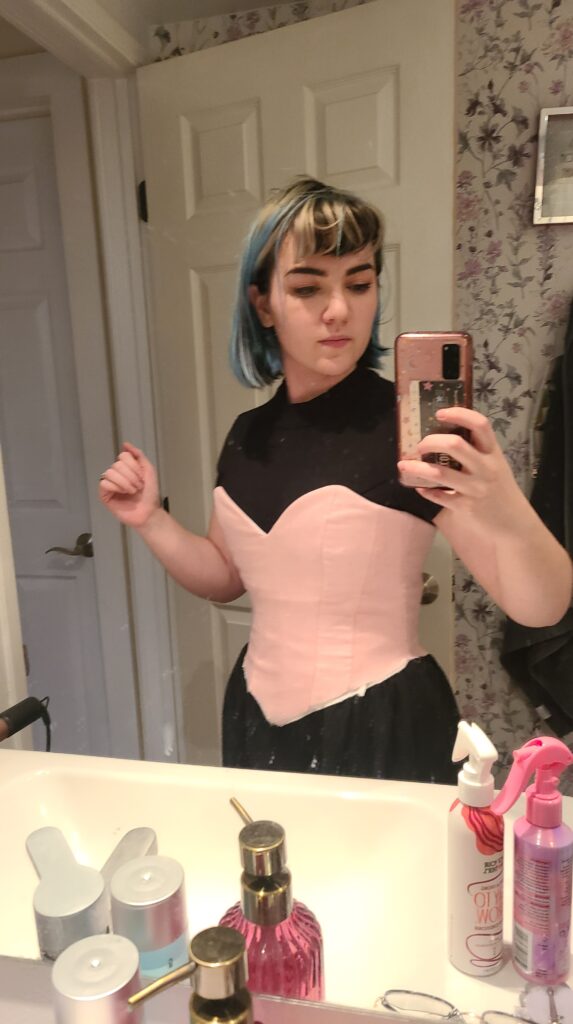
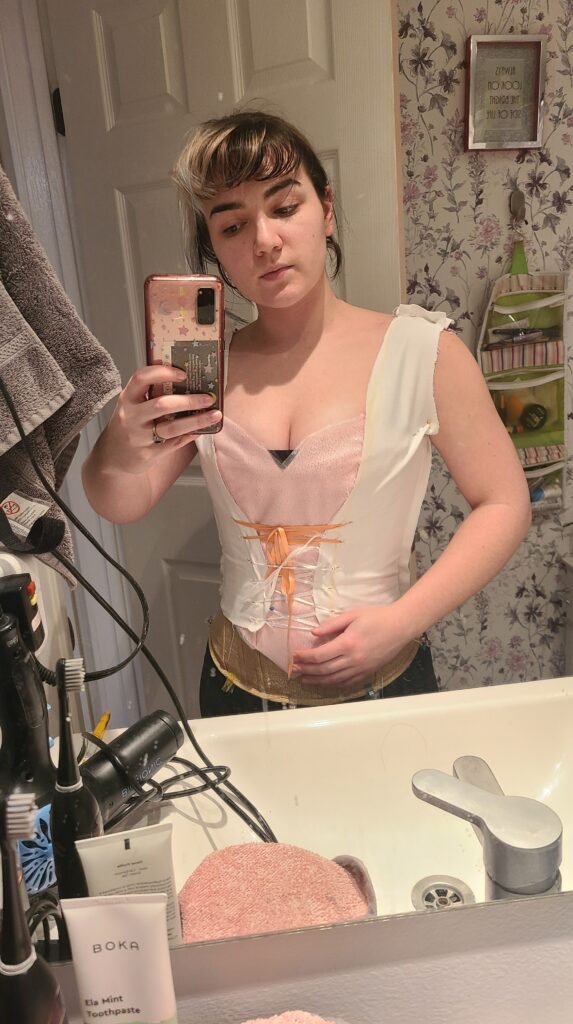
I boned it with a mixture of spiral and flat steel and used 0 size grommets for the back. These grommets were determined to pop out, so I’ve already replaced quite a few of them, but they seem to be reasonably well set now. I don’t know if my fabrics relaxed significantly or if I lost a little weight, but I sized it with a 2-3 inch lacing gap and ended up fully closing it at ECCC.
Once all that was done, I made up some bias tape out of the silk and hand finished it with a whipstitch onto the top and bottom. It ended up being a really nice piece, even if the back is determined to go diagonal. Please excuse the absolute grease monster I am in these photos – I realized two days before con that I didn’t have any photos of the final piece, so I was deep in crunch for these.


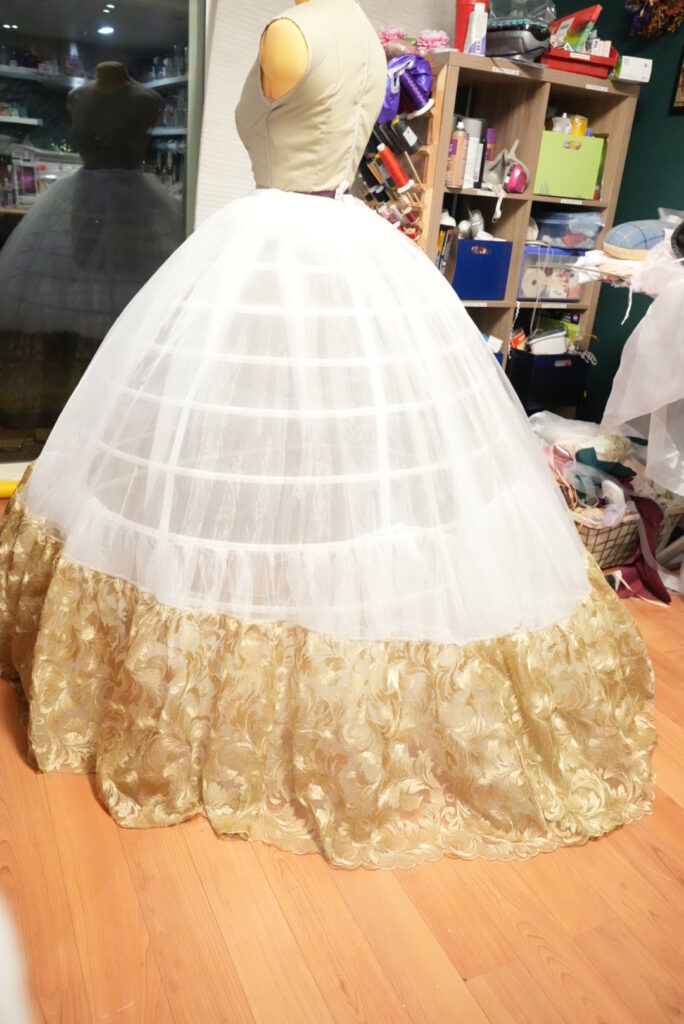
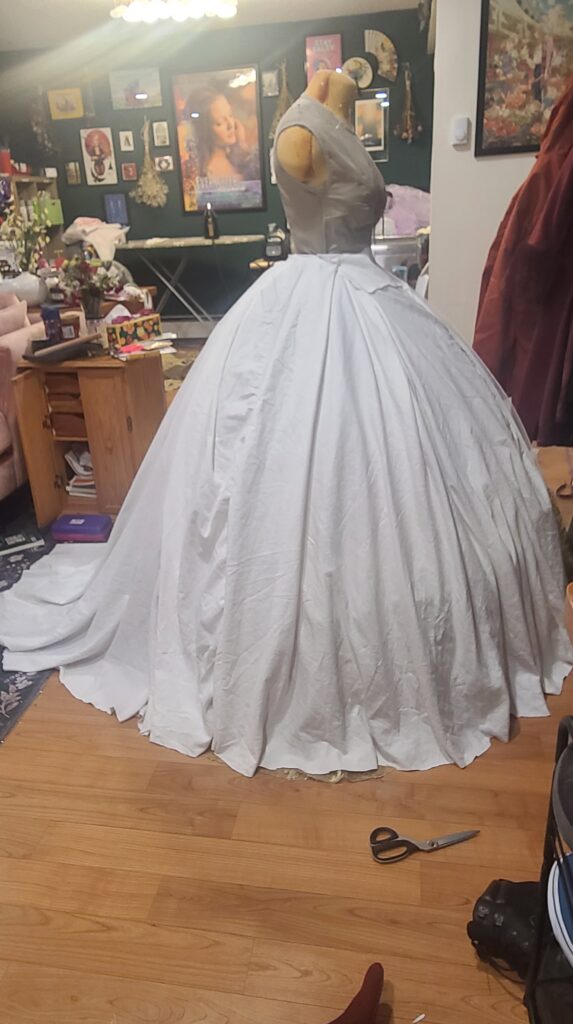
1.3 – Hoopskirt and Petticoats
I actually made this hoopskirt in September, but I knew that if I ever decided to compete again, I was going to need a really well done hoop, and I also knew that the Amazon one I’d been relying on was begging me for the sweet release of death.
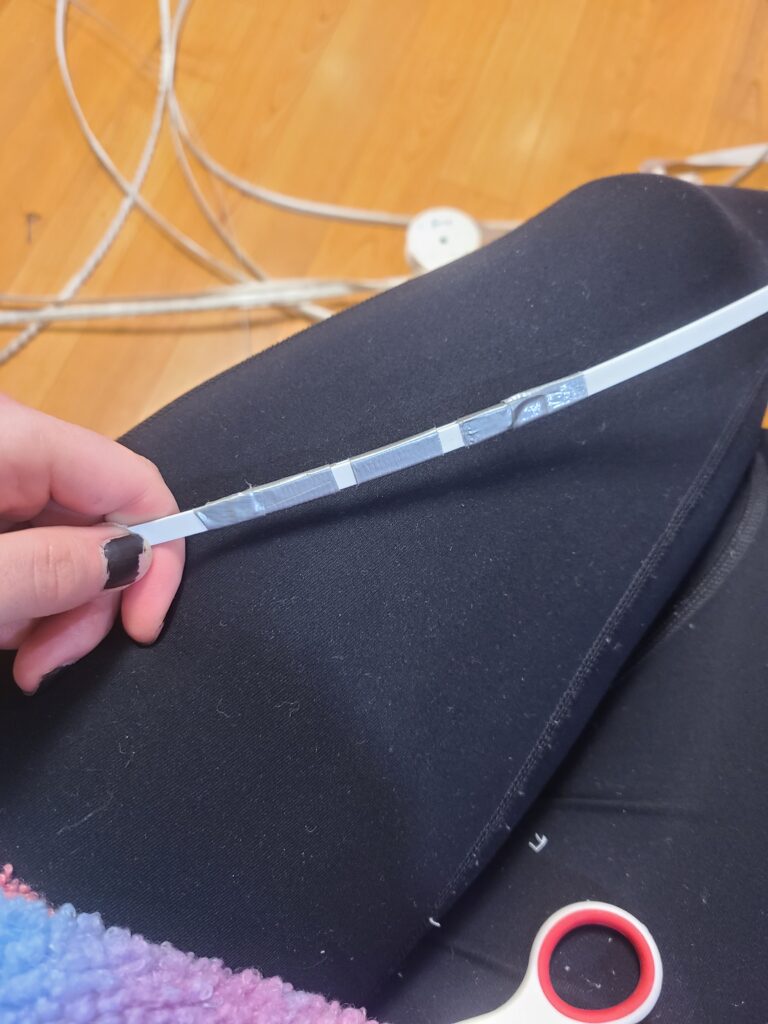
I started with a thick waistband made of purple cotton and set some eyelets to keep it adjustable, then took the hoops out of my old hoopskirts and vaguely approximated the dimensions of the old one. Each hoop channel got 2 pieces of boning for extra strength, and they were tipped and joined with good old fashioned duct tape. I have some heavy dresses and have experienced the nightmare hoopskirt collapse, so the extra weight was worth it.
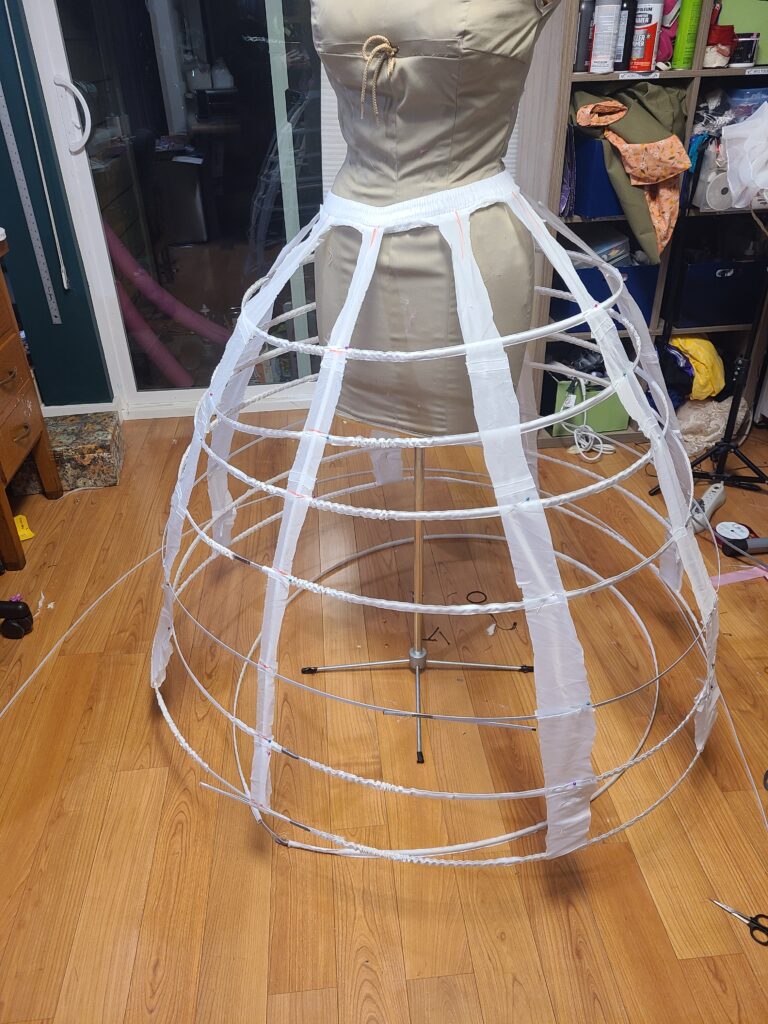
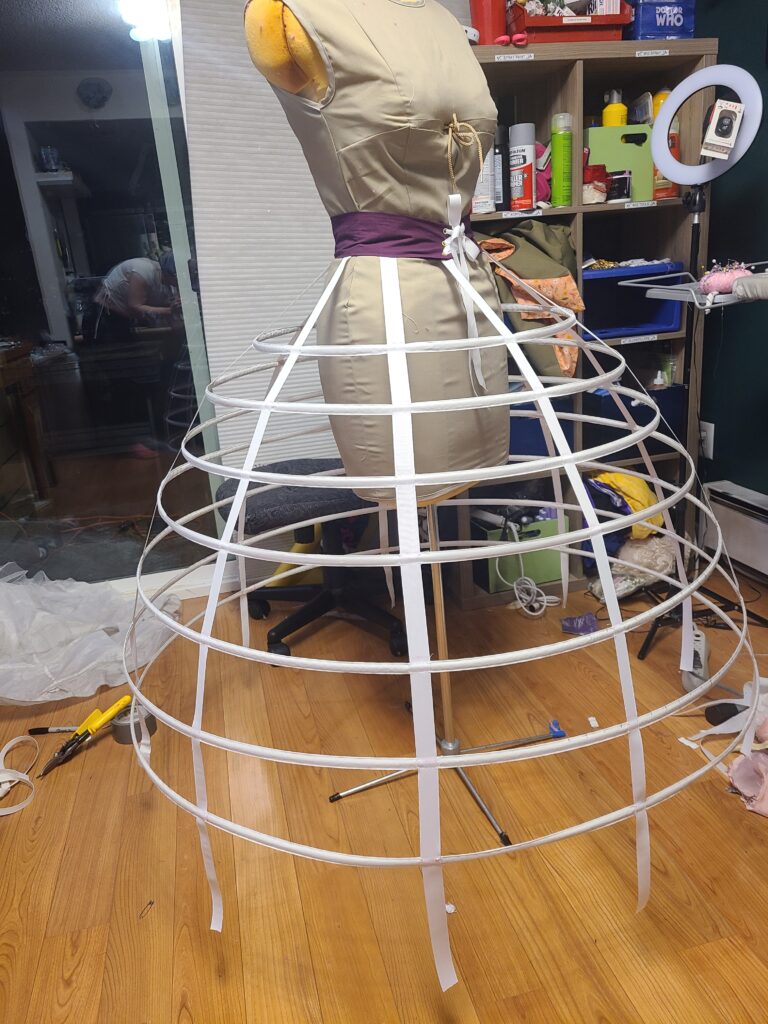
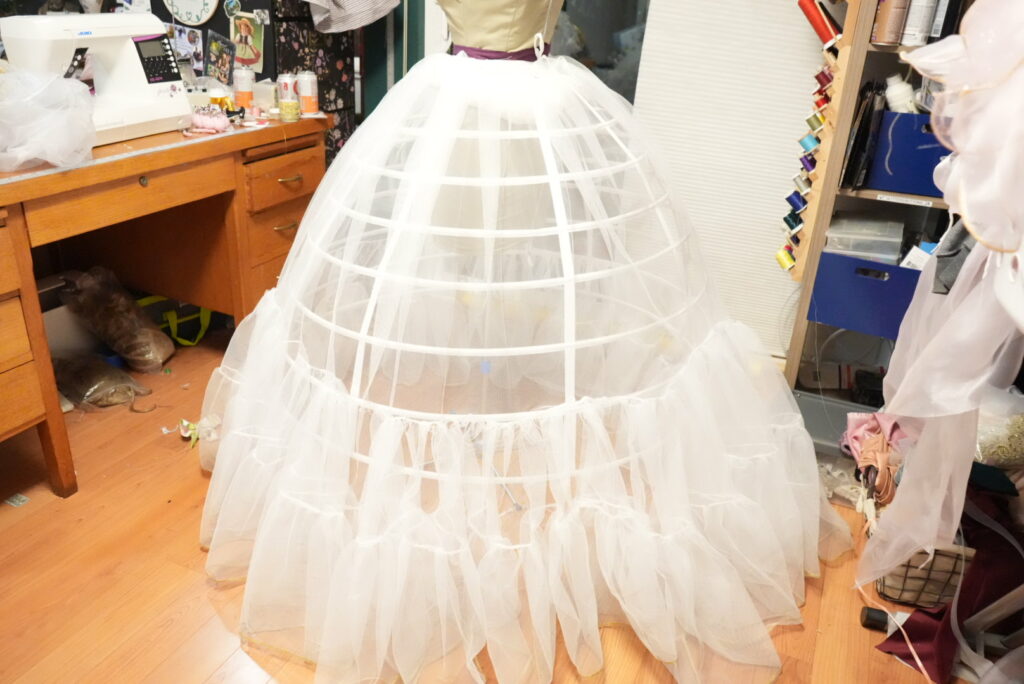
It’s nice to have a hoopskirt that’s actually the right length for me – I’m fairly short, so factory ones are too long – but it did also end up being about 10% bigger than my old one. No worries, since I make all my skirts extra fluffy, but definitely a point of anxiety until I tested out a few.
I marked out to the 8ths on the hoops to help line them up on the ribbons, but most of it ended up being kind of by eye. Once they were pinned and everything looked even, I hand stitched the hoops to the vertical support ribbons from smallest to largest.
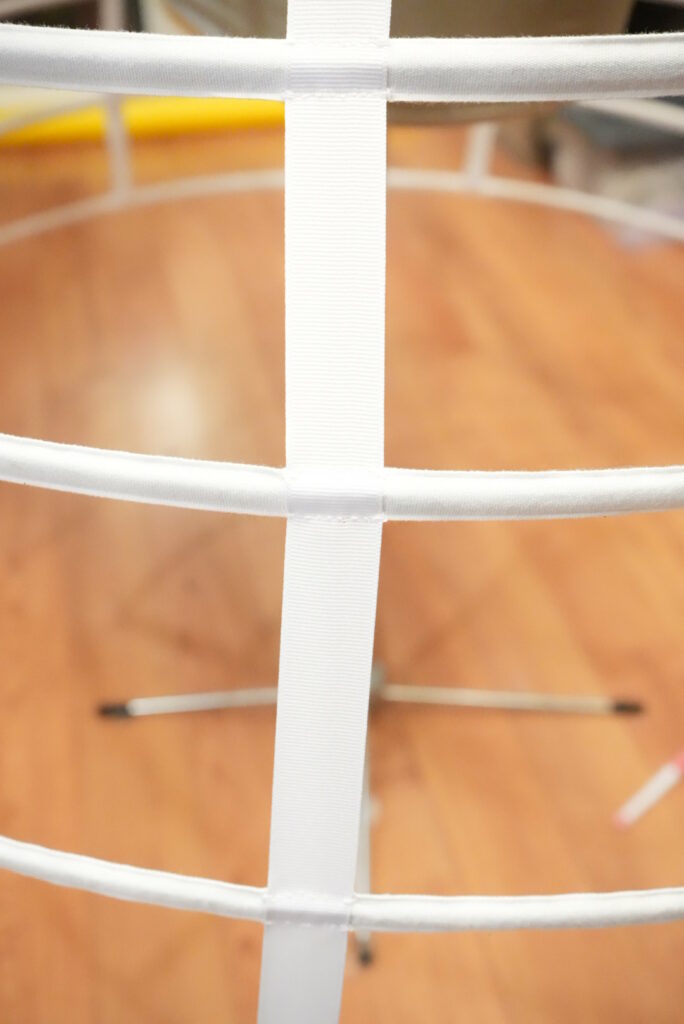
Could I have done that on the machine? Yeah. Honestly, I was so scared of bumping it and throwing all my pinning off that I didn’t want to risk taking the hoops on and off my dressform. It didn’t end up being too much work, but it did make my fingers sore by the end of the weekend.
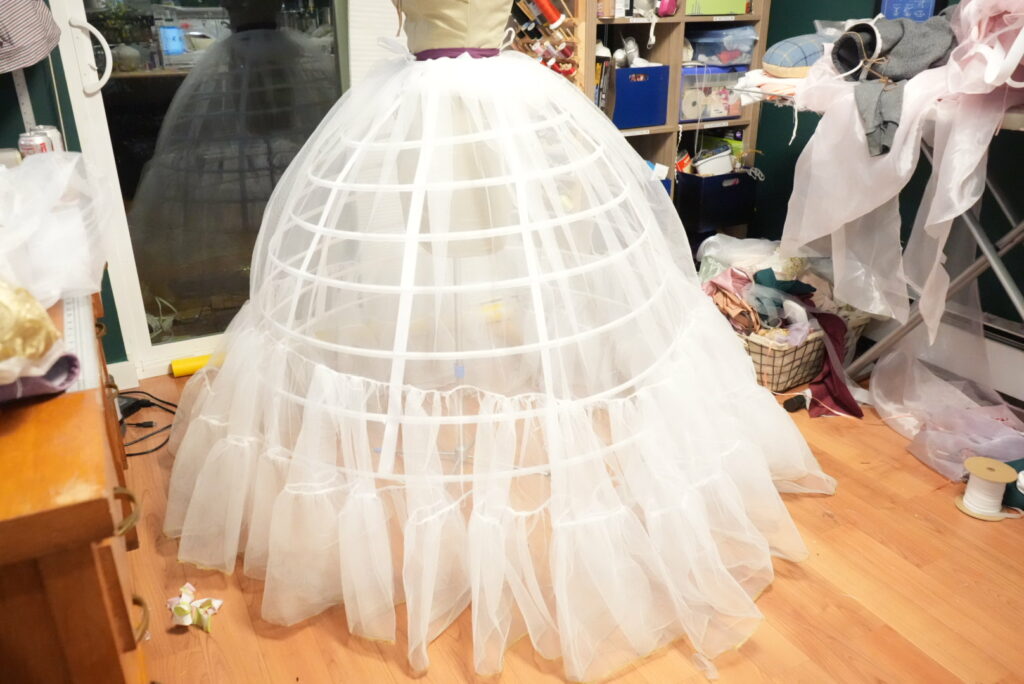
Both my petticoats for this project started their life as a wedding dress. The first one, made of the stiff tulle, was made of fabric seam ripped out of an A line dress and then cut into long, rectangular strips like most any standard tiered petticoat. Everything got french seamed, and I used some twill tape already in my stash for a quick, easy waistband. I knew it was going to be important to minimize bulk in the waist area, since I was going to have 6 skirts in this costume. I also made it slightly asymmetrical with more length in the back so I wouldn’t step on it (I stepped on it anyway). The week before con, I stitched on some tiny gold trim to the tulle hem, but I didn’t grab a picture of it.
The organza petti contains the greatest sin I have in this costume – the right side is longer than the left. I safety pinned it up so no one would notice for the contest (embarrassed emoji).
How did this happen? It was probably how the fabric settled after I sewed the gold lace fabric onto the bottom – I assumed since it was already cut into a circle skirt that I didn’t need to let it hang, but I’m pretty sure the extra weight did me in.
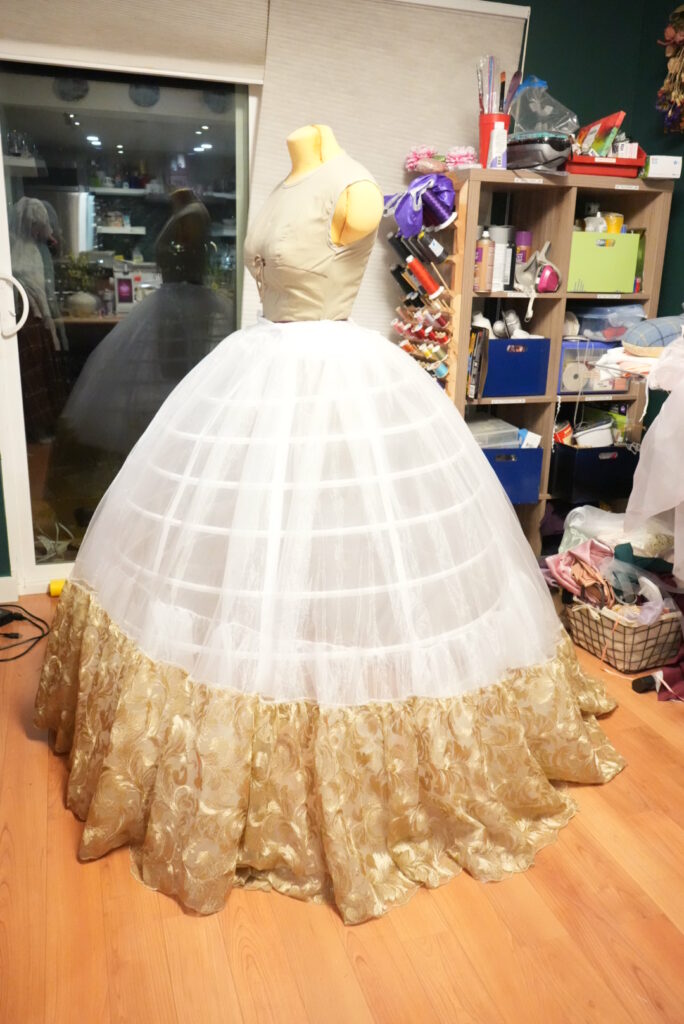
So the organza petti is a slightly lopsided ¾ circle skirt, pleated at the waistband, and finished with leftover gold lace fabric from my 1996 Holiday Barbie I ended up not using for the project. I gathered the lace slightly – working with leftover fabric, I wanted to use all of it, but I didn’t have quite enough to do the traditional 2x or 4x length for tiered petticoats. It was more like 1.5x, but the result is nice enough regardless that I’m not upset about the outcome.
I met a new friend at ECCC, a very seasoned competitor and judge, who told me “When I judge, people always ask me how I suss out what the novices and journeymen are hiding, and I’ll tell you – it’s never the novices or the journeymen. With them, it’s always out in the open. Now, the masters – y’all are sneaky! And I’ve been sneaky too, so I know!”
That pretty much sums up why I didn’t fix the skirt. So, ECCC judges, consider this my confession. My deepest, darkest Barbie Rapunzel secret, hidden smack dab in the middle of a 6 skirt sandwich where I knew y’all wouldn’t have the time to get all the way into in a 5 minute prejudging slot. I’m very sorry, and it weighs deeply on my conscious every day.
A few things to fix in the future – I may add one more hoop onto the bottom of the hoopskirt. Currently, the bottom one has a habit of scootching up, so I want a little more weight and structure down there to keep it down in place. I will also finally go back and fix the organza petticoat at some point.
1.4 – Chemisette and Bum Roll
These were actually the last things I made for the dress – quite literally two days before con. I wanted a slightly bigger bum roll to better balance the weight of the overskirts (to enough success to warrant the work) and needed a lower cut underlayer.
I made both out of an old bedsheet – if I’d had more time, I probably would have dyed the chemisette pink to match the under dress in case it shifted and became visible (surprise! That happened at my photoshoot post con), but in the ECCC crunch it was not a step I had time or energy for.
The chemisette was based off an old cami I have, and just two pieces cut on the bias. The top has a facing understitched down and I made some spaghetti straps to keep it on.
I also didn’t factor in quite enough room for my hips, so I ended up doing side slits up to the top of my hips. I’ll probably go back into this and just hem off the bottom and make it just a top instead of the half dress it currently is.
The bum roll was based off the one already in my closet. I got a bum roll pattern from Scroop, but again, at this point in the build, I was out of time and energy, and just went with the big ol’ crescent moon stuffed sausage approach and eyeballed the whole thing.
No pics of these, because they’re icky and I don’t like them very much, but they’re serviceable.
Part 2 – The Dress
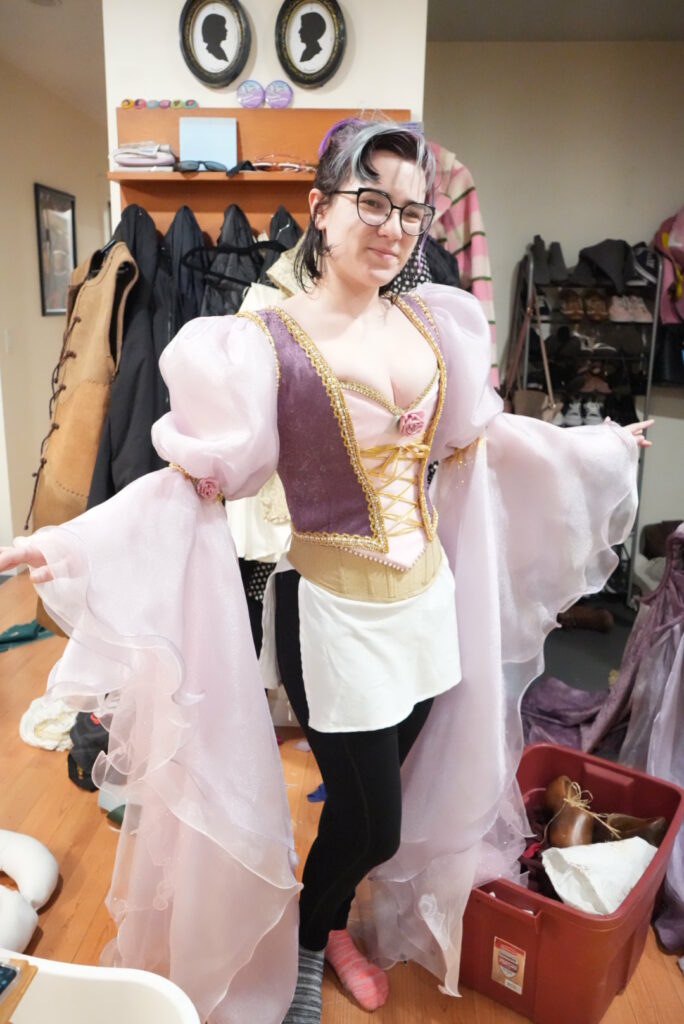
2.0 – The Pink Bodice
I finished the undergarments about the end of December, which left me a month to do the dress itself before the contest submission deadline, and two months before it had to be completely done for ECCC. Luckily, I had the foresight to finish all my other costumes for ECCC before I started on Rapunzel – I cannot recommend this approach enough, so protip if you’re planning on doing a craftsmanship competition, especially if you’re a dumbass who basically starts the competition piece 75 days before the con (which I decidedly do not recommend).
I started with the pink bodice, since I knew I could whip that out pretty quickly, and that’d free up all the rest of my pink fabric to be used on the skirts to make them as fluffy as possible.
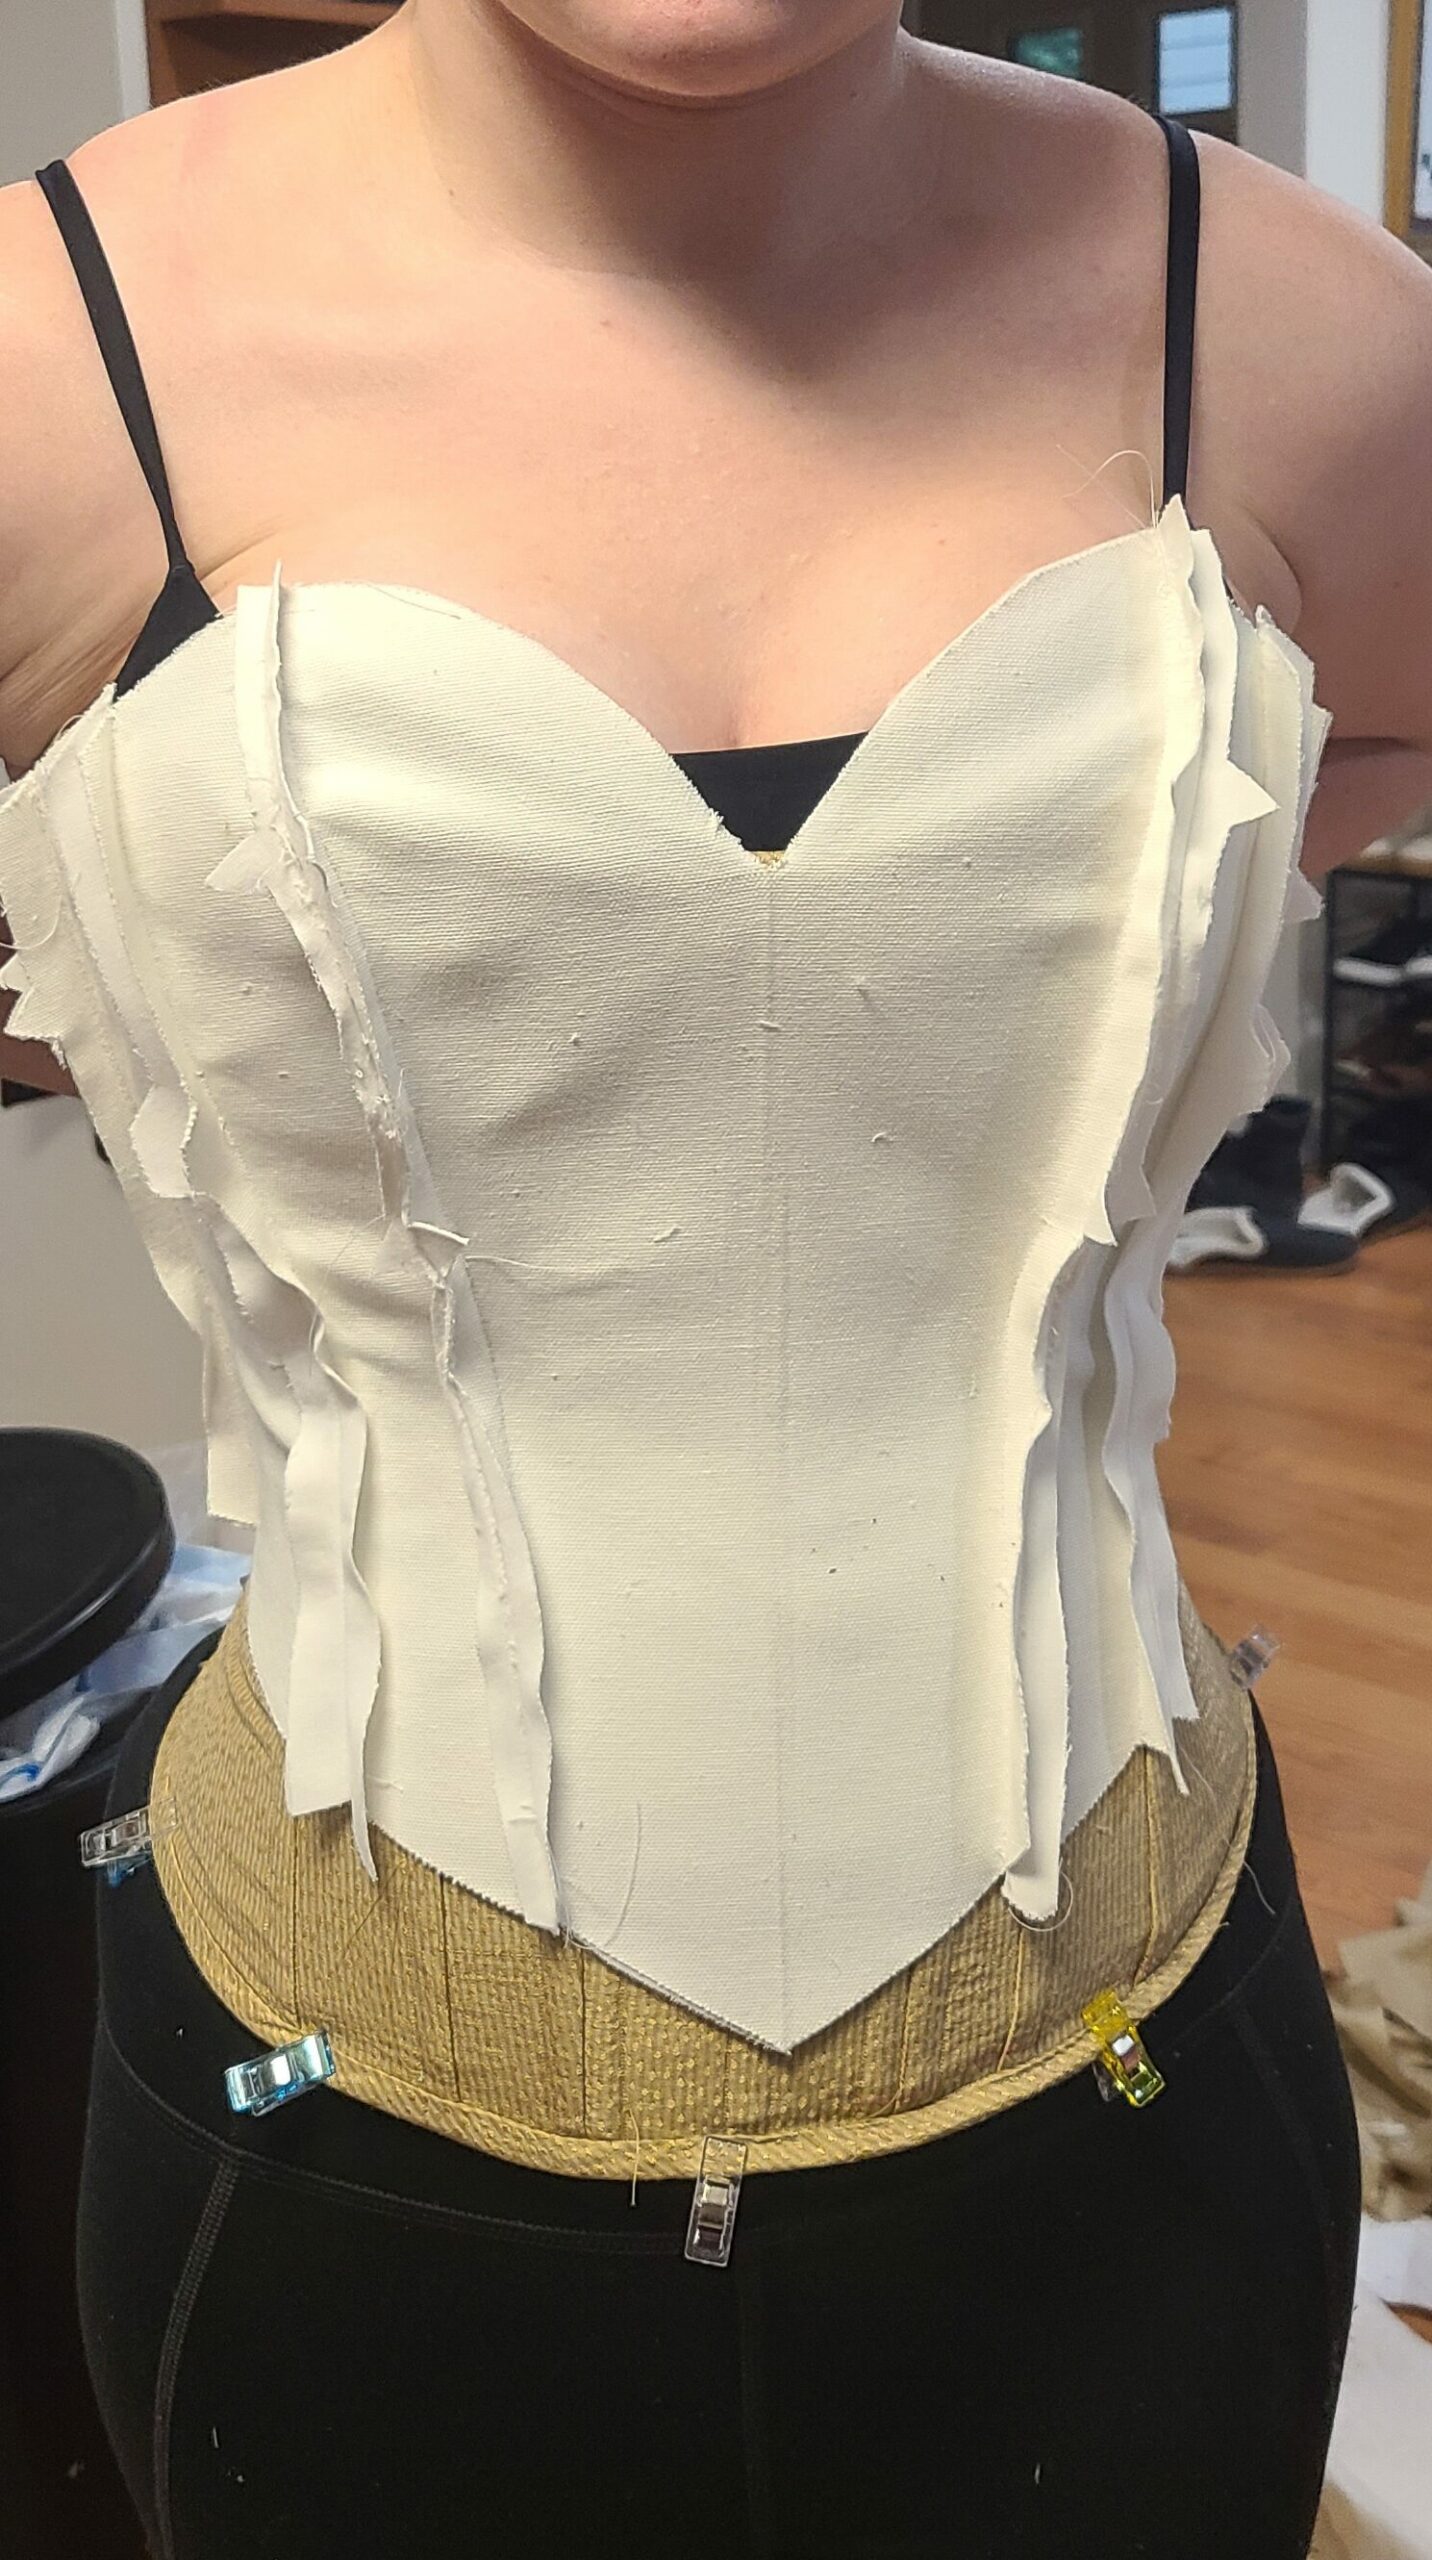
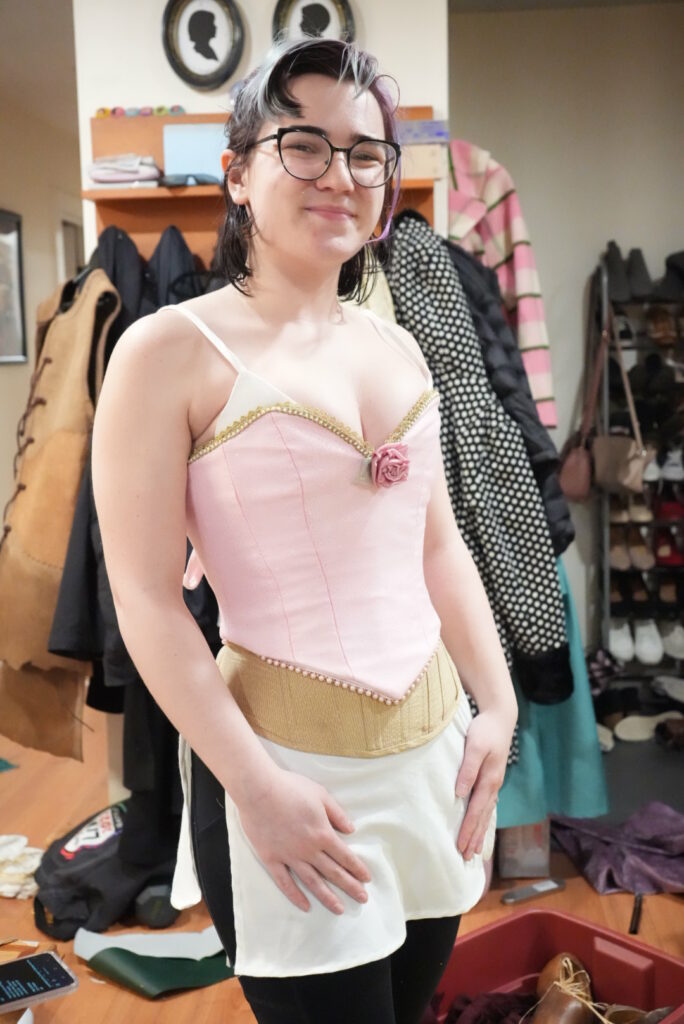
The bodice was based off of Simplicity 5006, which has been my go-to strapless sweetheart bodice pattern forever. I actually used it to make my Coronation Elsa way back for ECCC 2016, which was my first corset-style bodice! This time around, I shortened out the entire hip region, eliminated the front seam, and exaggerated the sweetheart neckline and front bottom point. I dipped it pretty low to try out a more flattering neckline for my bust, and I’m really happy with the decision! I have a pretty big bust for my frame, and often I feel like I have no collarbone because my boobs are squished up to my neck. The result is that this dress is very cleavage-y, but I think it’s much more flattering and creates the illusion of a slightly longer torso.

I layered the pink organza and glitter tulle over a leftover pink satin scrap I found digging through my drawer. I needed to conserve the matte fabric I bought for the skirt – I only got 8 yards, which seems like a lot, but I had 14-15 of the other fabrics, so it was definitely limiting in comparison.
The corset underneath does most of the necessary shaping work for the dress, so I only used a few pieces of boning for the pink bodice, and pressed and pinked the seams on the interior. The white duck canvas is also interfaced for extra strength with a mid weight woven interfacing. Woven fusible interfacing is my new best friend. For this bodice I ended up using a twill tape style cover on pressed open, pinked seams. More bulk reduction, yay!
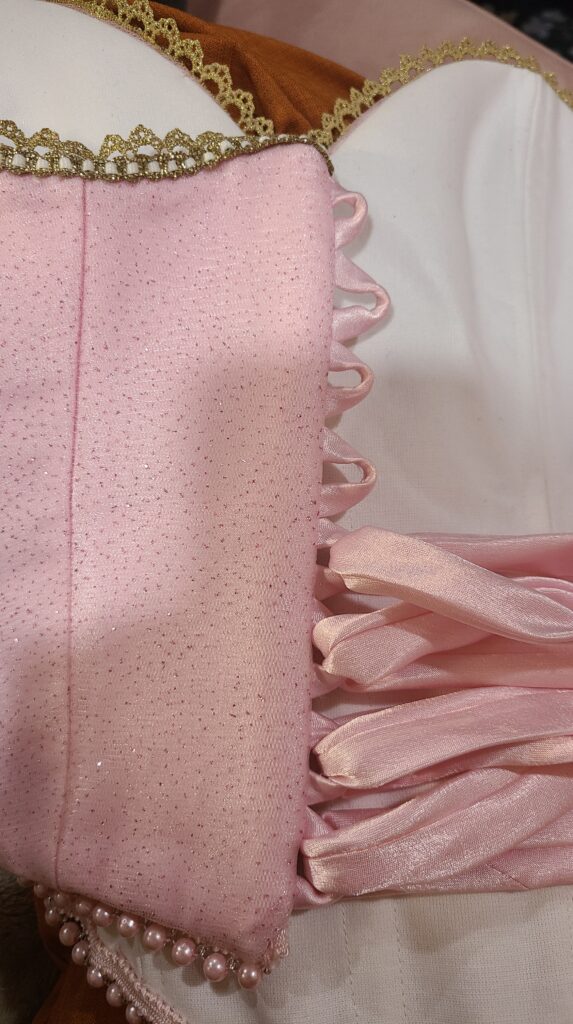
I made lacing loops for the back out of the leftover pink satin, and a big lacing ribbon. I waffled a lot on how I wanted to close this bodice and ended up going with the lacing loops because I wanted to use a variety of techniques, and I didn’t need the strength for this bodice that I needed for the corset since, again, the corset held the stress of my body.
I’m very proud of how clean the sweetheart neckline and bottom point of the bodice are! It’s usually a place I really struggle with, especially using a bag lining (bag lining sucks, y’all, it never gets easier). But boy howdy, did I get those points SHARP. I also knew that if I didn’t have time to do trim, those two features were quite literally front and center, so I needed to do that really well.
Unfortunately, there wasn’t really a secret technique I can share on this. I just went really slow, used my iron a lot, and trimmed my seam allowances really tightly, all things I hate doing as an impatient sewist terrified of making garments too small.
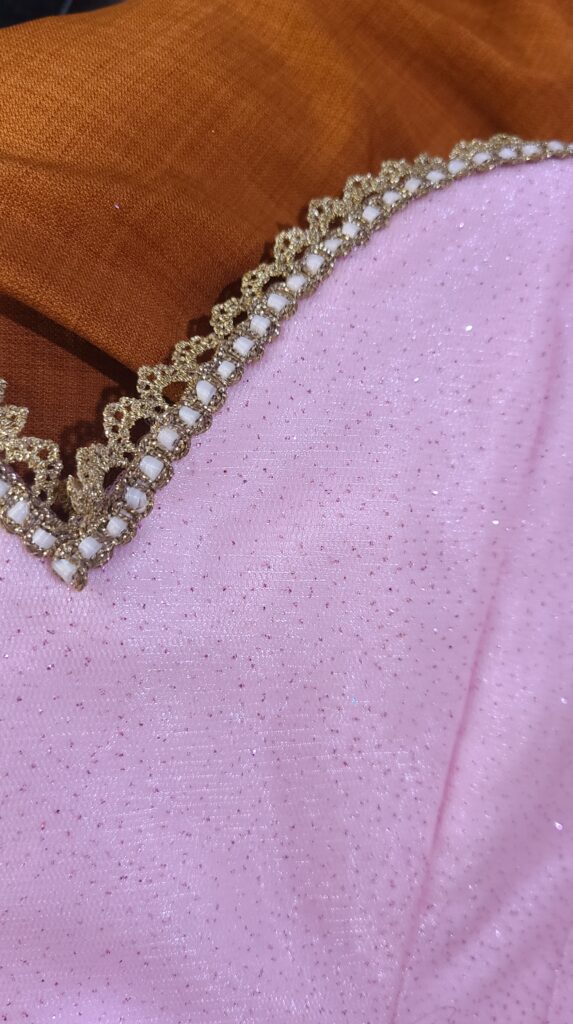
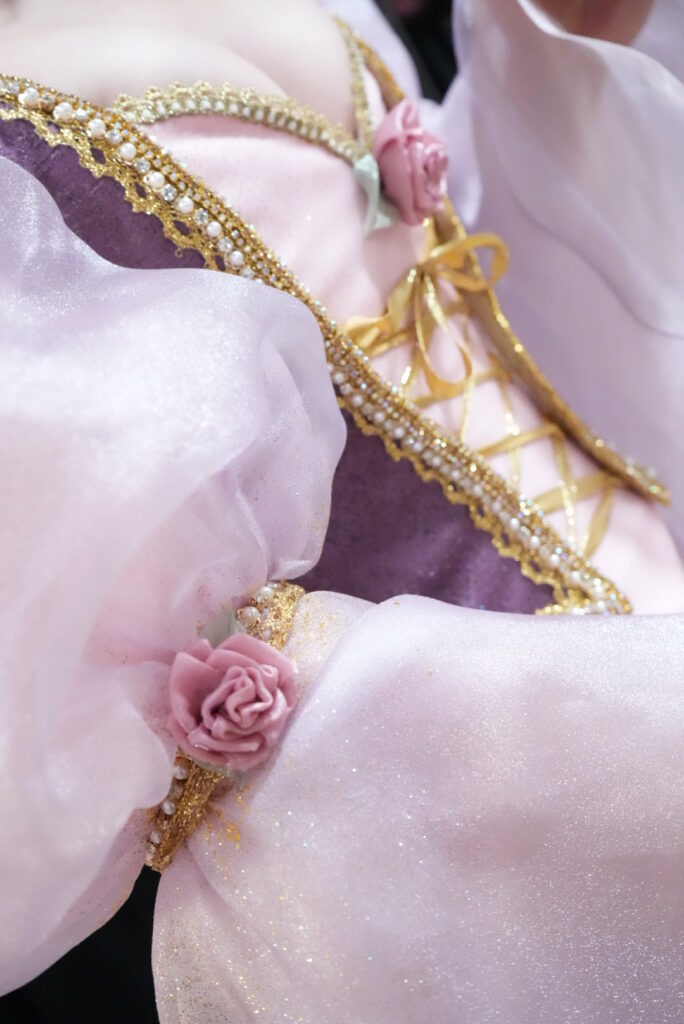
I layered two gold trims for the top of the corset to match the movie art and hand stitched them down at a craft day at the Bellevue Library Makerspace (go hang out with @BrianneOpal!!), then used a pink pearl trim for the bottom edge and hand sewed that on at the Stuff You Should Know live show. Hand stitching went most places with me in the months of January and February.
2.1 – The Overbodice
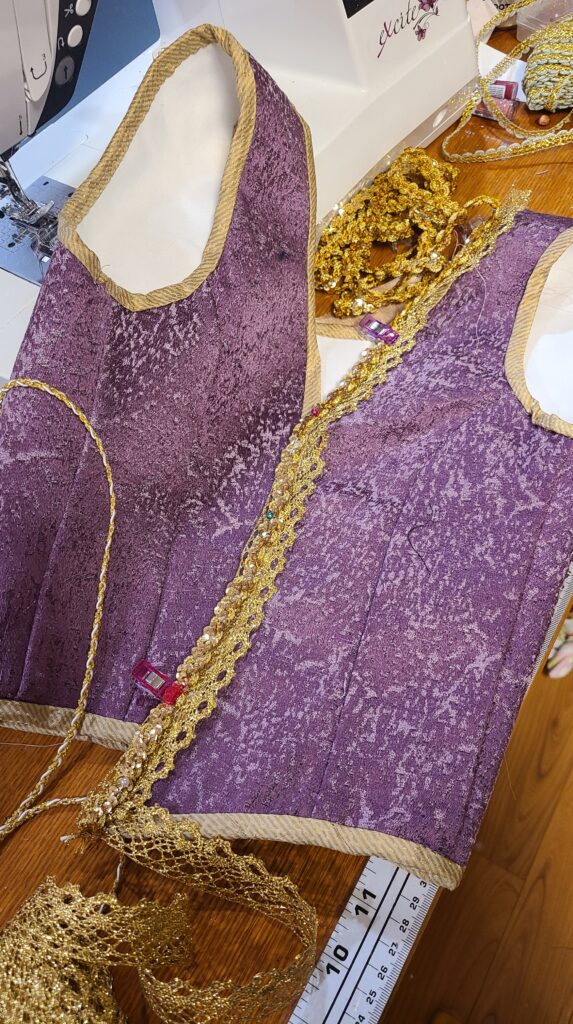
One of the very early decisions I made for this dress was to keep the purple overbodice separate from the pink bodice, which I figured would give the gown more depth and realism while also making it easier to repurpose later if I so chose to.
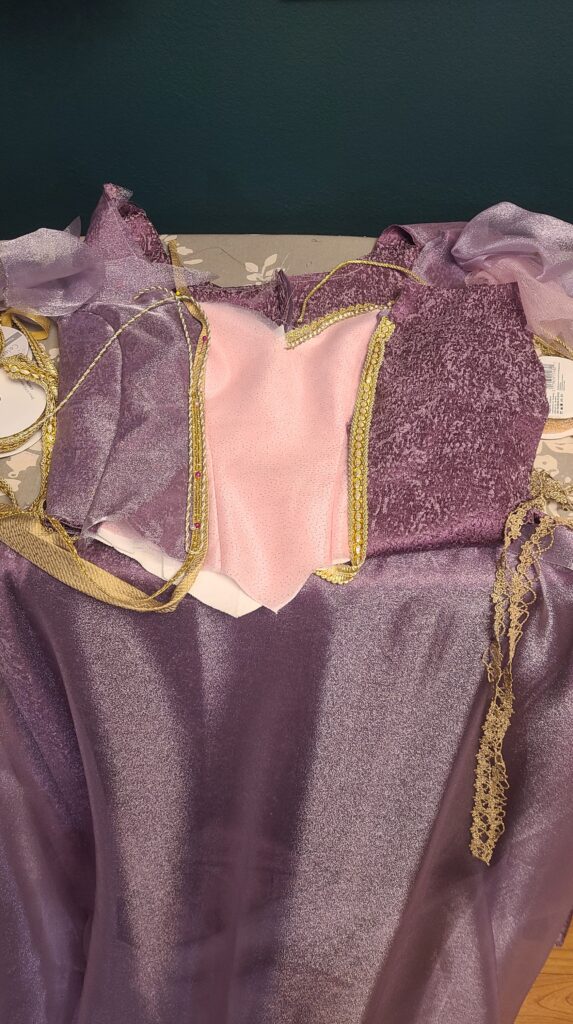
The vest was self drafted and based super loosely on a German Cranach gown bodice – fun little tie in to my previous historical Rapunzel and her German fairytale roots – and came together pretty easily. I lined it in the interfaced duck canvas and put in two bones on the sides to help it keep its shape. I initially covered the purple upholstery fabric with the lavender organza, but decided against it – while it added to the shimmer, it eliminated all the contrast in the dress and made it feel much more one note. One of the reasons I bought the upholstery fabric was that I really liked the texture, and not being able to see it made me sad!
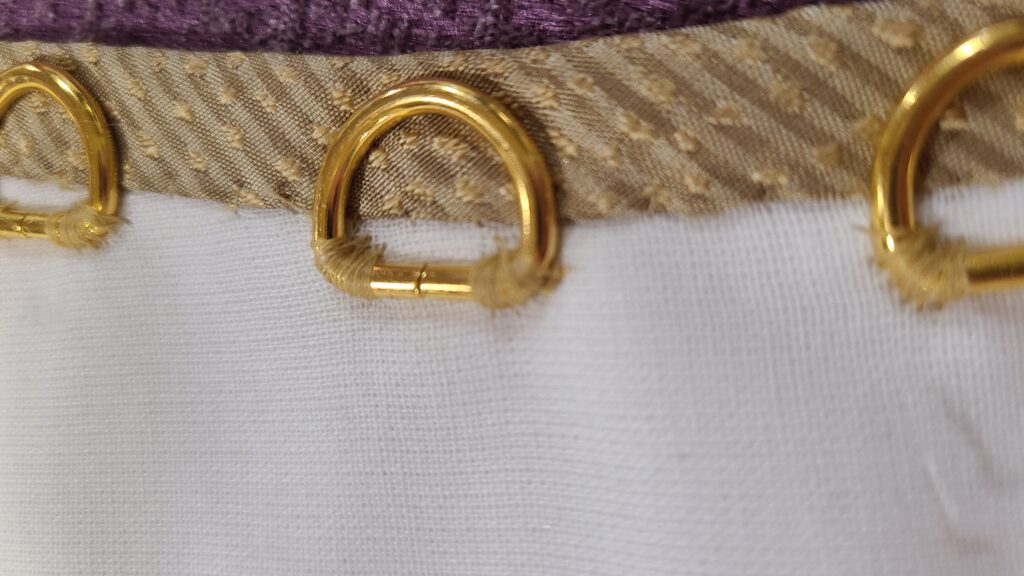
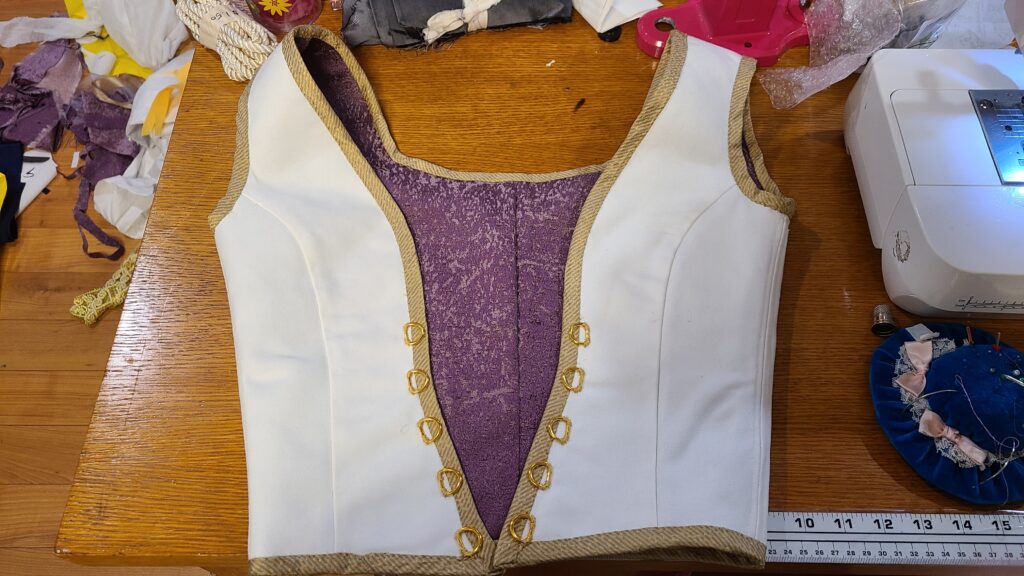
There’s a hint of front lacing in the concept illustrations, so I took that, along with my sister’s Barbie Rapunzel from the 1990s that had front lacing closures on her dress, and I ran with it. I love a good front closure, so the overbodice has D-rings for lacing hand sewn into the canvas. I got the idea of D-rings from my friend Lexi, who was putting D-rings into their bodice one evening instead of traditional lacing rings. They were right – D-rings all the way. Way more stable than traditional lacing rings, and easier.
I did end up needing to seam rip the shoulders and adjust the arm scythes down, because once I could lace the bodice it fit a lot differently. It ended up being an easy adjustment that I pulled off in one try at 2am – an approach I wouldn’t endorse, but it definitely worked out this time around.
I made more bias tape out of the gold corset silk and whipstitched it on to make everything nice and neat and cover the raw edges.
Secret snob alert: my favorite thing is properly attached bias tape, whether by hand or machine. I cry a little when I see people post about attaching both sides at once.
While making this, I thought I could get away with just the side boning, since the rest of my torso is swimming in metal and the overbodice is two pretty heavy fabrics, but it does have a tendency to ride up as I wear it, leaving some really ghastly gaping on my shoulders. I’m debating some hooks to keep it in the right spot, or boning, or both, for future wears, but it definitely needs something.
As noted above, the pink bodice got trim first – two layered trims on top, and one pearl trim on bottom. Those decisions were super easy. That was followed by overbodice trims, which really stumped me. I bought a lot of different trims for this, and combined them in every way I could think to, and none of them felt right. Some were the wrong gold tone, some had a scale problem, and none of them made me happy!
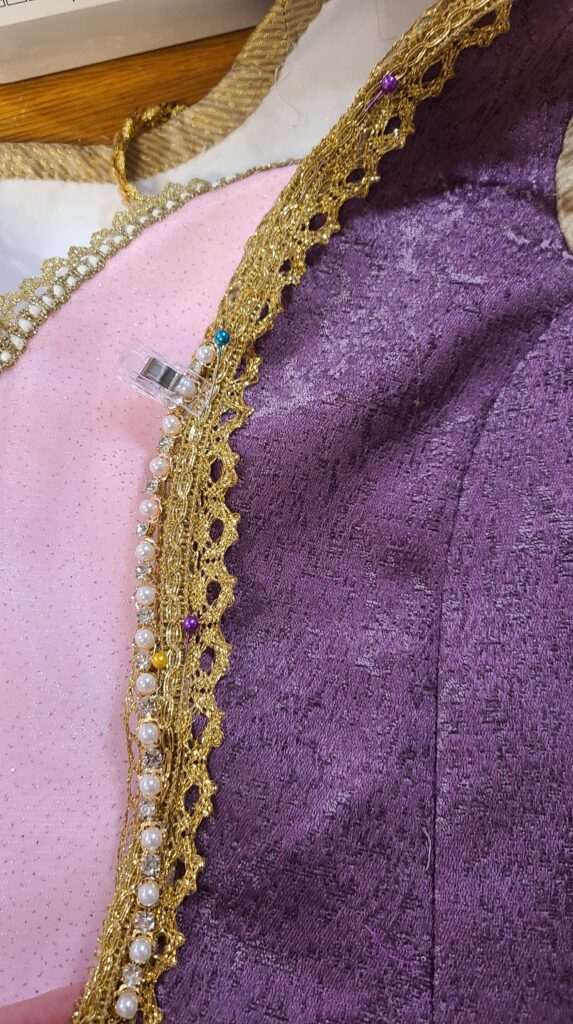
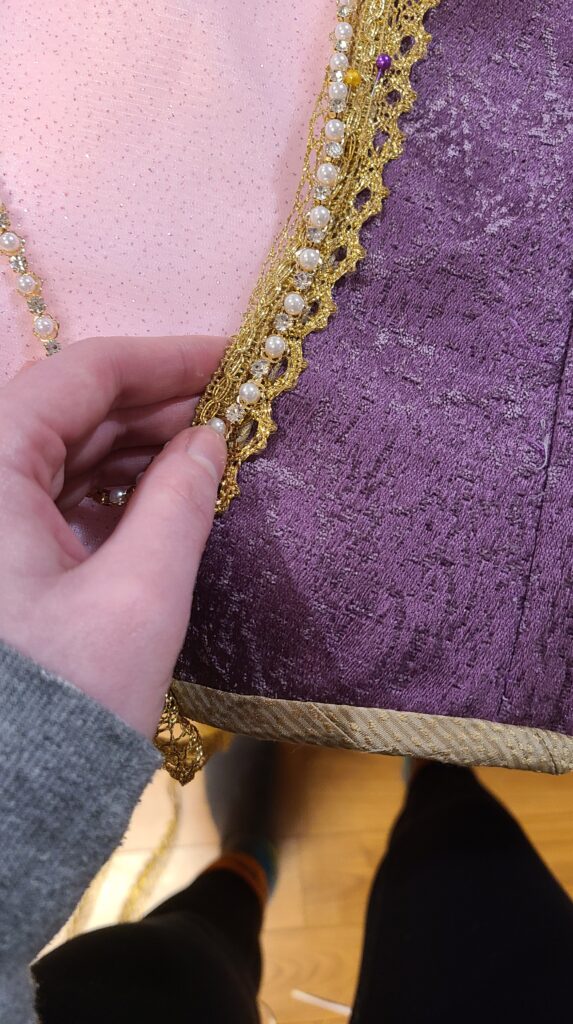
My friend G, who made an adorable Rapunzel for himself for con (Surprise! My cosplay was actually a secret group cosplay. We got one photo together and then I had to go back to panicking, Lexi had to take off their wig, and G needed to get out of his costume completely), was talking about his sleeves at a crafting hang we were having while I was in Trimbo. He had a bunch of AB rhinestone trim left over, and I stole it immediately, layered it with a pearl trim and another gold trim, and finally had my overbodice sorted. It ended up being the literal perfect amount for my bodice with about 6 inches to spare.
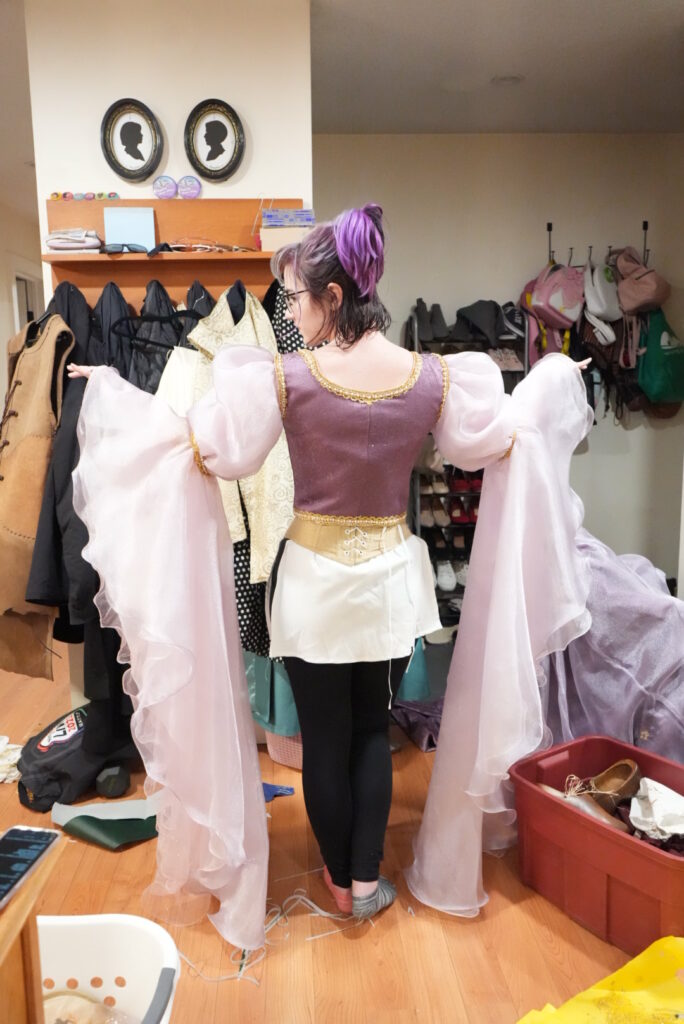
2.2 – The Sleeves
Okay, the moment we’ve all been waiting for, let’s talk about the sleeves. Yes, they get their own entire section.
I love the sleeves.
I went with a triple layer sleeve – pink organza, glitter tulle, and lavender organza – to tie everything in with itself. The doll sleeves are a contrasting iridescent organza type, which I do love but I really didn’t feel like spending any more money than I already, so I went rogue.
And I like to think if there had been the budget for giant, floor length, waterfall, lettuce hem sleeves in the year 2002, this is exactly what the dress sleeves would have been, so truly it’s just committing to the initial vision of the artists.
The sleeve is constructed in two parts: the upper and the lower sleeve. The upper sleeve is a pretty typical bell sleeve, with the glitter tulle sandwiched between the two organzas to minimize the scratchiness, and the lower sleeve is just a giant oval with a cutout in the middle for my arm.
Sometimes, a girl wants to fulfull her childhood fantasies of the giantest, flowiest, princessiest sleeves, and she chooses a Barbie Rapunzel costume to make them.
I debated a bunch of different shapes for this lower sleeve, and my initial design had a slit so my forearm was bare, with a big, trailing cape style sleeve. Grey convinced me after mockup #1 that it’d be better to have a full length sleeve, and I agreed. Mockup #2 was perfect, so I cut the fabric. For the lower, the lavender organza is still the outermost layer, but the glitter tulle and the pink organza swap places. Itchier, but I really didn’t want the glitter getting lost in the sleeve, so the itchiness is worth it.
I sewed the two halves together, dyed a little bias tape lavender to match the sleeves, and covered all the raw edges with it. I lettuce hemmed each layer with fishing line and a small zig zag stitch with silver metallic thread – my initial intent was to go back in and do a second pass on the zigzag, but after doing that on the skirt hems, I was worried the long, beautiful swoops of the sleeves would be ruined if I did that, so I just trimmed as close to the stitching as I could and passed the lighter over the hems to melt the organza and keep it from fraying.
This was also what I was doing in line for pre-judging, embarrassingly enough. I got most of it done the night before, but I kept finding little spots I missed, so the scissors came to con with me. Don’t be like me, kids. Start your costumes more than 75 days before con, and finish them more than 1 hour before prejudging.
The sleeves and the overbodice are also hand stitched together. I did this after all the trim was sewn on, because the sleeves make moving the overbodice around a nightmare.
On the sleeves, I just used the gold trim and the pearl trim. Everything got hand stitched on in layers, and I found my new favorite thread for attaching trims – machine embroidery thread! Super slippery, reasonably strong, and extra thin. Made the entire process easy as pie (and if rolling pie dough aggravates my tendonosis the same way as hand stitching on trim, the simile still counts).
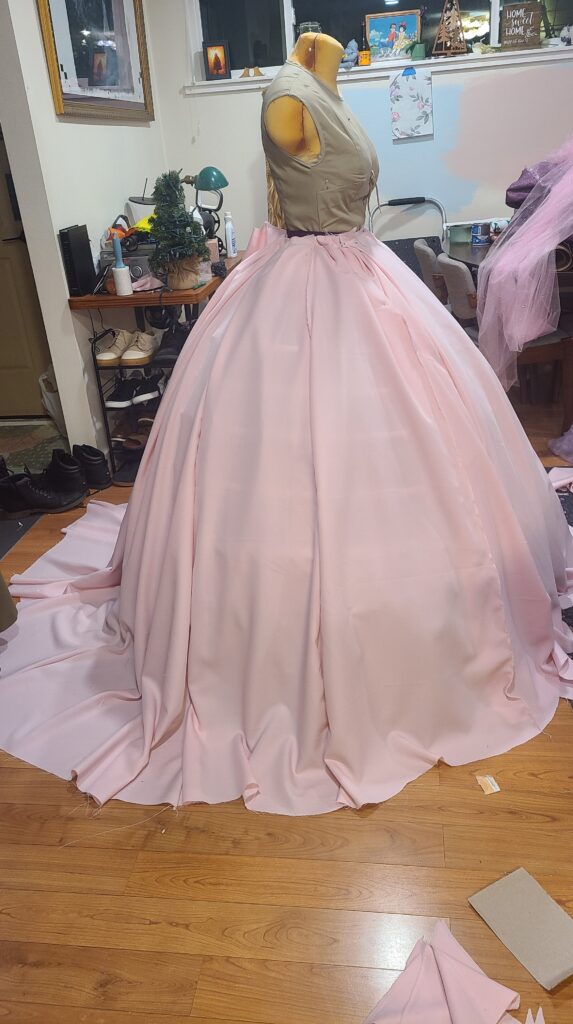
2.4 – The Pink Skirts
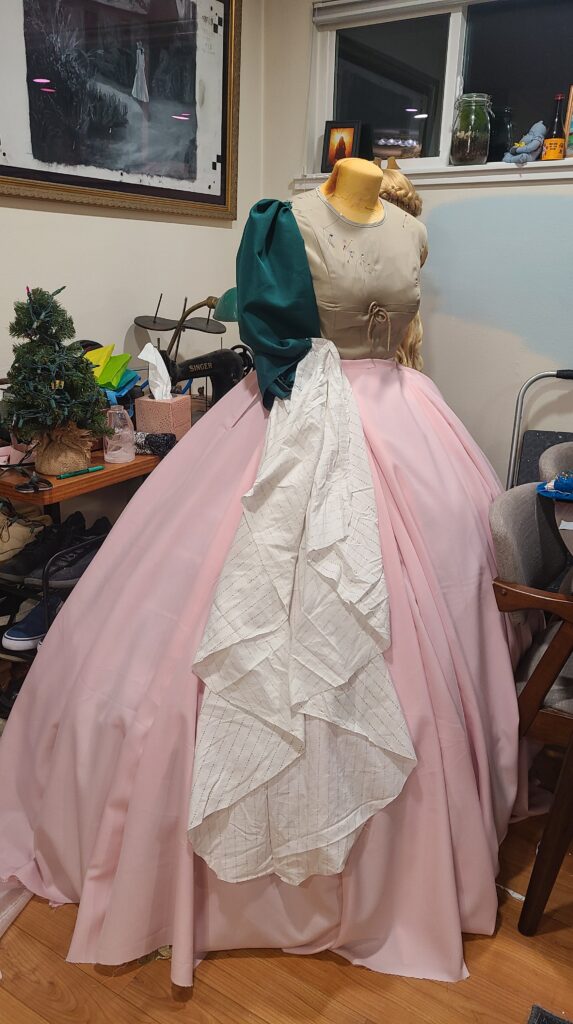
Each of the skirts was made on the same rough pattern – a 9 panel 1 ½ circle skirt cut with a slight train at the back. I patterned it out with an old bedsheet until it was about right, and then expanded the fabric at the waistband with each of the sheer overlayers to finally get the fluff at the waist I’d been holding off through all the underskirts.
The base skirt, what I’ve been calling the Matte, has a historical-style split waistband that ties in the front and back, and it’s pleated to reduce bulk.
There’s two skirts on top of that, the pink organza, and the glitter tulle. Each layer slightly longer than the last, just by a few inches, to make sure the final dress has a good, even hem. I had wild aspirations of 6 foot long trains that I pretty much ended up entirely cutting since I couldn’t quite get them to lay right underneath the overskirt.
All the waistbands are hand finished on the backside, and each skirt is constructed with French seams. I do think I swapped panels on the glitter skirt, because there ended up being matching short parts at the same point on both sides, but by the time I noticed it I had already done the first level and attached the waistband, so there was no going back and seam ripping. Instead, I took scraps I had left over and hand sewed them onto the glitter skirt using transparent thread. It worked like a charm – honestly, even I have trouble locating them now that the skirt’s all hemmed up.
I let them all hang for a few days, first on hangers, and then on the dress form (propped up on a milk crate so nothing touched the floor) before trimming them for their final hems. My normal ballgown skirt method is just giant gathered rectangles, and I maintain that you circle skirt people are fruit bats. It’s so much more work. (It does spin very pretty, I’ll give you that I guess.)
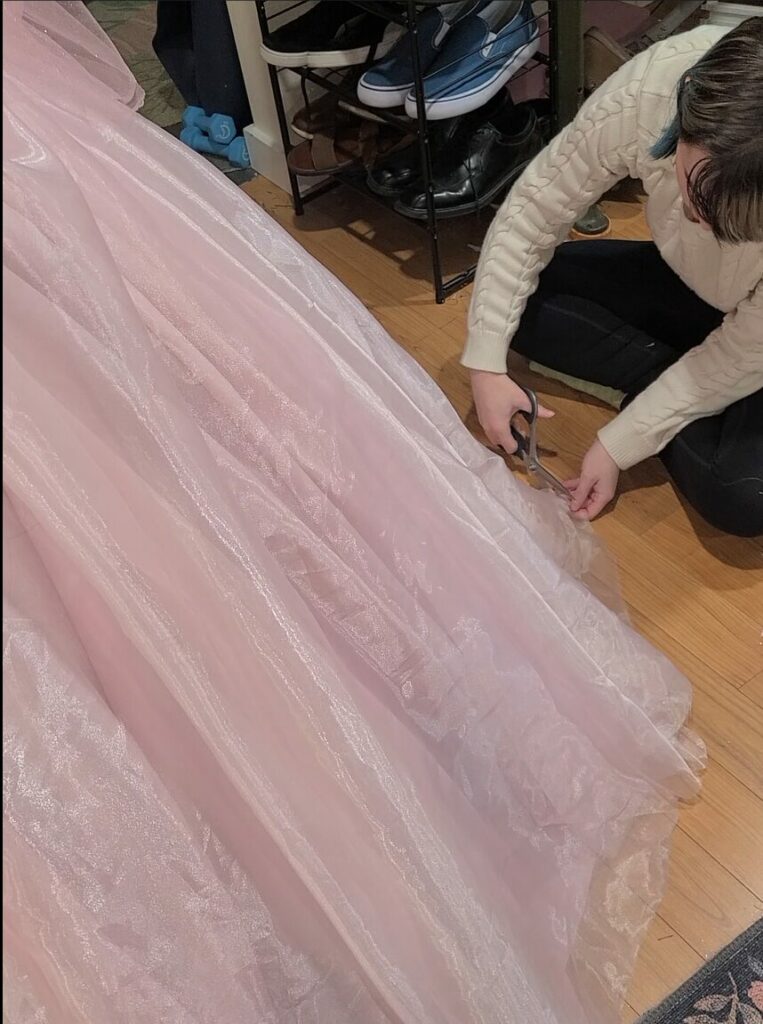
Once they were ready for hems, I did the Matte skirt with 1 inch horsehair braid, and then finished the overskirts with gold and silver metallic thread over fishing line. I went over these hems twice, which produced a really nice, clean lettuce hem, which I, of course, ripped immediately at ECCC on an escalator. Almost an entire decade of doing con escalators in ballgowns without a single incident, and the moment I make a modicum of effort for a pretty hem, the cosplay gods smite me. Typical.
The sheer skirt waistbands, above, are whipstitched for a finish that won’t weigh down the skirt gathers or be visible from the exterior of the dress. I used the matte skirt scraps for their waistband, which worked fine. The matte fabric frays like a bitch, but it was also $4/yard and the exact color I wanted, so it was a tolerable frustration.

When I did my first full try on, I found that the skirt layers really liked shifting around on me, so when I wore it for ECCC, I tied the waistbands together. Worked like a charm, reduced time I needed to get dressed, and kept the layers together but easily separated for cleaning or repurposing later, and if there’s one thing I believe in in cosplay, it’s making things as re-purposeable as possible. These skirts will probably go on to live as petticoats for another project, and it’s important that I can use just one or the other.
2.5 – The Overskirt
The overskirt is made of two layers, upholstery fabric that matches the overbodice, and lavender organza that matches the sleeves. It also uses the same basic circle skirt pattern, but I edited out the front panels and lengthened it where possible to make a train.
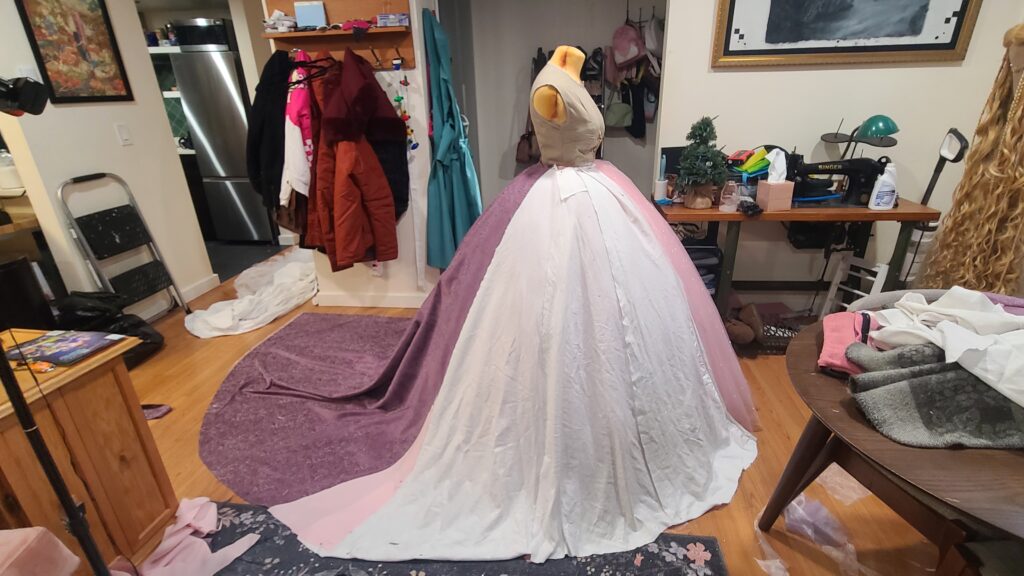
Once it was pleated, I attached it to a waistband with a hook and eye closure, and then I got to hemming. The upholstery layer got a 4 inch horsehair hem, and the organza got a tiny rolled hem.
In some step somewhere, I made a major goof, and I somehow trimmed the overlayer way shorter than the upholstery layer, so I did end up needing to go back in and seam rip the entire hem (RIP me, 7 yards of hem later).
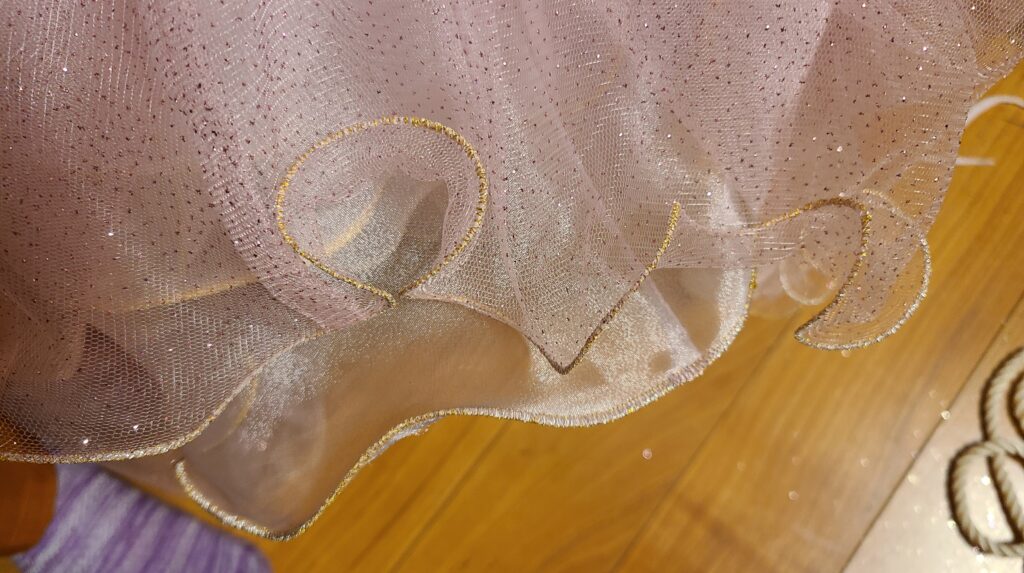
The overskirt appliques are really where I lost time on this dress. The fabric I got needed to be cut out in order for it to be used to edge the skirt, but I kept getting lost in the weeds of the netting.
I didn’t like the netting, so I melted it all off. Was it silly? Yeah, probably, but I had a vision, okay? And the vision required me to sit outside in the freezing Seattle winter, chasing daylight, wearing a ventilator, melting the appliques out with a soldering iron. At some point, I stopped forming memories out there, but I’m pretty sure it took me a good week of all my daylight crafting hours.

Once that was done, I pinned it and then stitched it on to the lavender organza. My first pass was just with my normal foot, and then Grey reminded me that I own a free motion quilting foot, and I was off to the races. (And by off to the races, I mean I was sitting at my machine for hours going in loopty-loops getting the dang bottom sewn on). I also ended up snipping chunks of the glitter edging and folding it in on itself to match the curve of the hem and lay flat. So each of the repeating pattern chunks are actually slightly different, since I had to snip and fold differently to match the curve in the skirt at any given point.
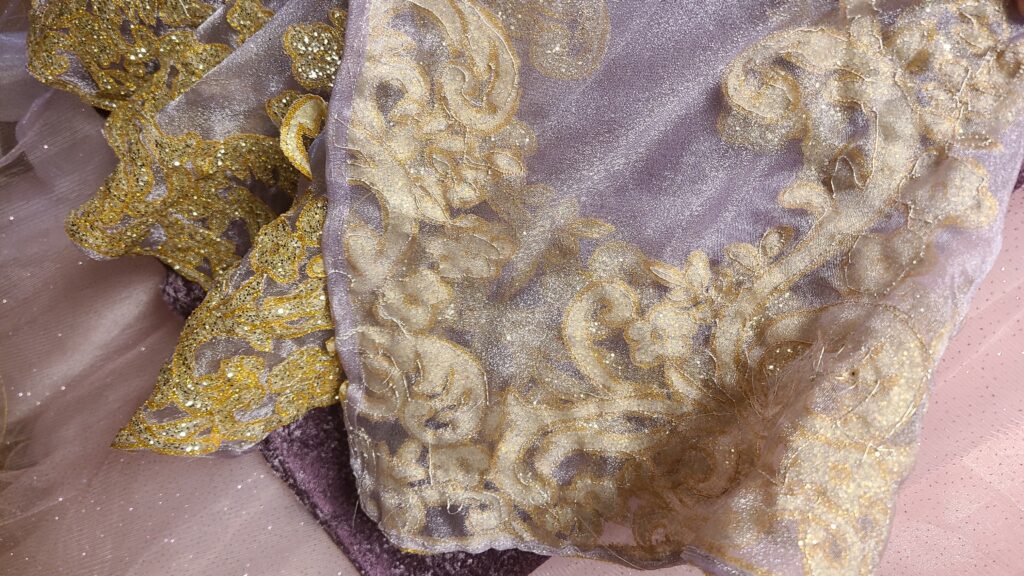
Once I finished that, I placed more appliques freeform, heavier near the hem and lightening up as they got closer to the bodice, rather than equally all over the skirt like the doll. I figured that would probably translate better to real life, and I think I was right.
I regard the overskirt as a middling success, but I do think it’s the weakest part of the costume. The extra weight of the upholstery fabric train, unfortunately, unbalances all the skirts as I walk around unless I’m really, really careful. I may hem the upholstery layer to match the pink skirts next time around, just for balance’s sake.
Part 3 – The Details
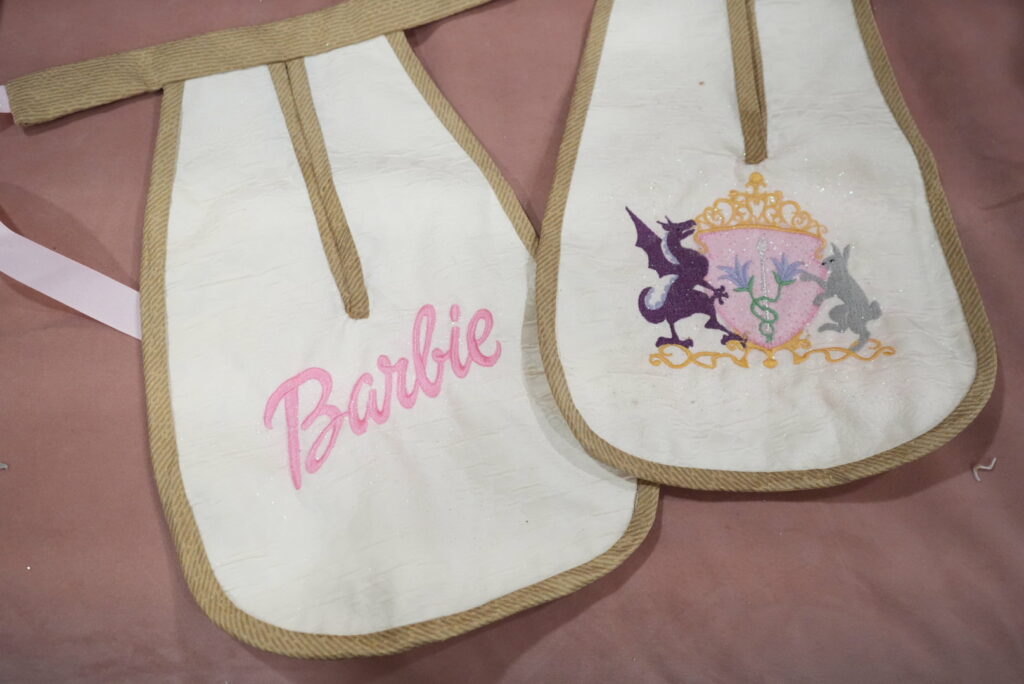
3.0 – The Pockets
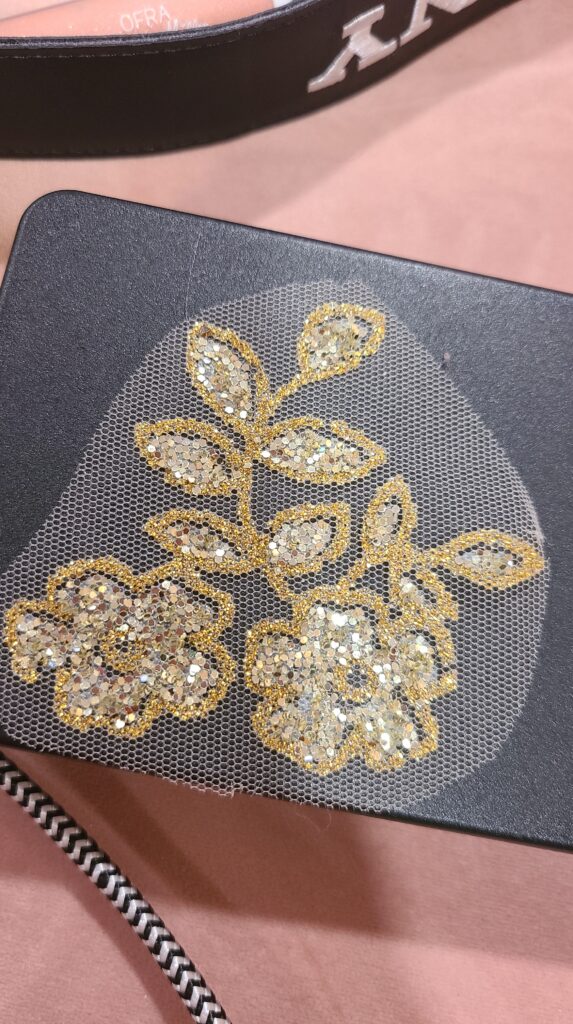
These pockets were my first foray into machine embroidery! I bought myself a used Designer Diamond way back in 2020 as a “Congratulations on getting a Big Girl job and graduating college” present to myself, but it sat in the carrying case until just a couple months ago because I didn’t have the space to set it up. After sacrificing a dining room to the sewing gods, I finally have dedicated desk space for it!
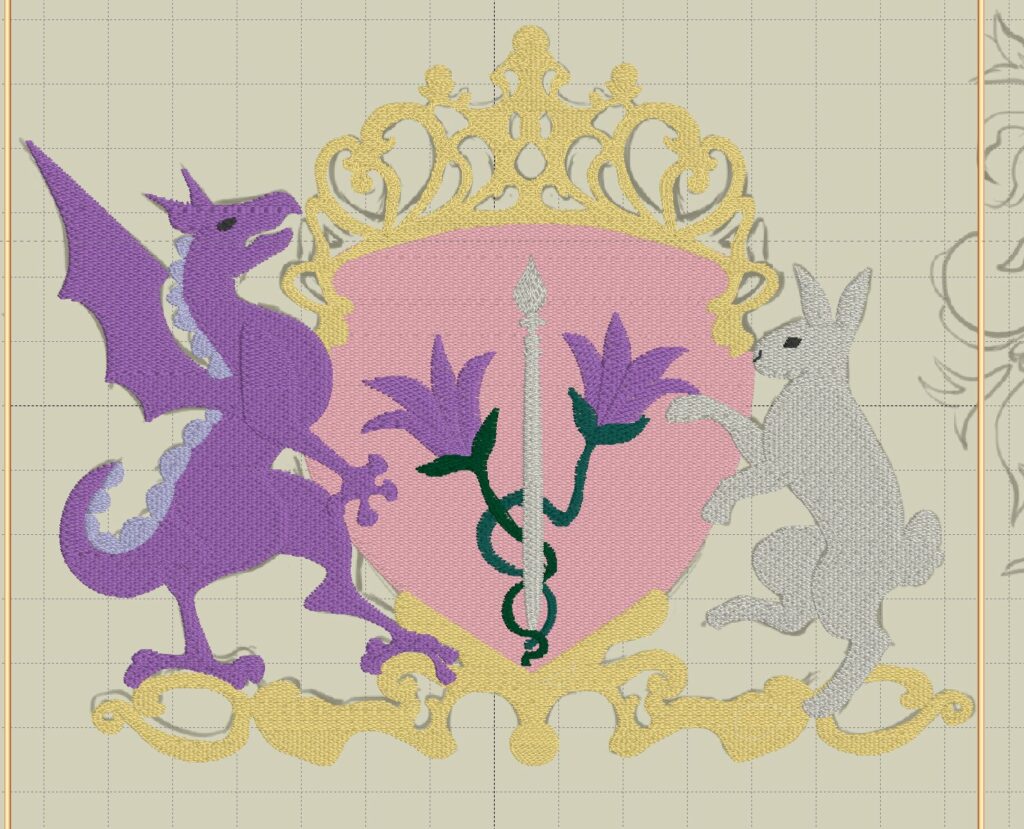
My best friend designed a heraldic crest for Rapunzel incorporating her two sidekicks, Penelope the dragon and Hobie the rabbit, as well as her paintbrush, crown, and Rapunzel flowers. I digitized the design in Embrilliance and stitched it out on my embroidery machine. This took a lot of trial and error, and I ended up completely redrawing all the gold items in the design to be column satin stitches instead of fill stitches. Major thanks to @erikaalamode, who helped me troubleshoot and bestowed me with all the machine embroidery wisdom a girl could ever wish for.
So, a pro tip from her to me to you: fill stitches will probably fail when going over an area more than 2-3 times (like a tiny, intricate crown for a pocket embellishment). Redraw the entire thing in satin stitches, it’s worth the extra couple hours.
During this process, I learned my machine is an old model of the Designer Diamond that doesn’t have a backstop in the takeup lever to keep the thread from slipping out, so I ended up threading the takeup lever from left to right. It felt illegal, but it worked like a charm! My normal maintenance shop told me that the next time I bring it in, they can make a note to replace the take up lever with the new model, but for now, function is function.
I had just enough fabric left over from the corset to finish up the pockets, so that ended up being really lucky.
The Barbie logo on the other pocket is from 2002, they year the movie was released, and I digitized that as well in about 20 minutes and it stitched out perfectly first try. I’m at the peak of the Dunning-Kruger effect on machine embroidery, so no one ruin this for me.
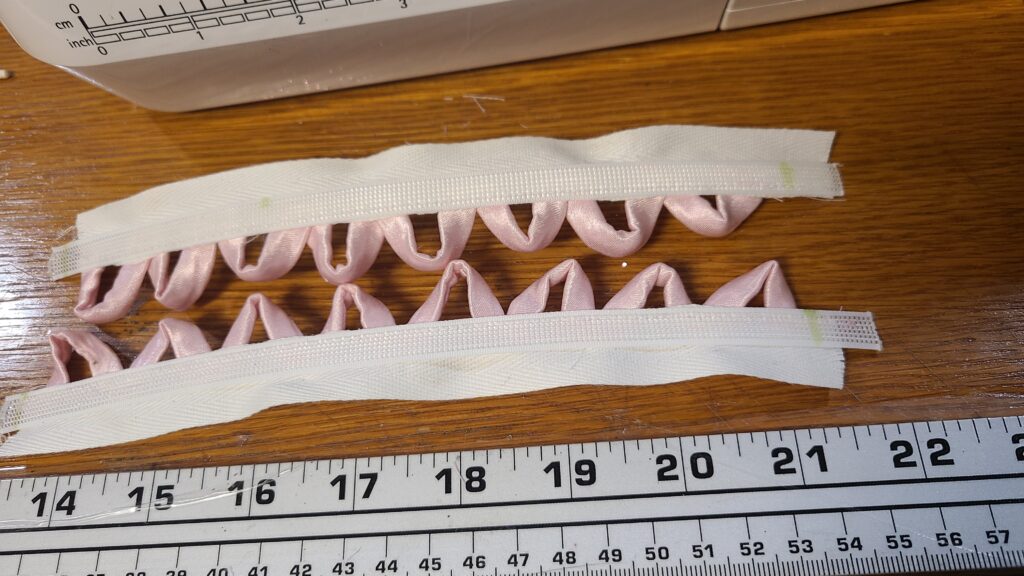
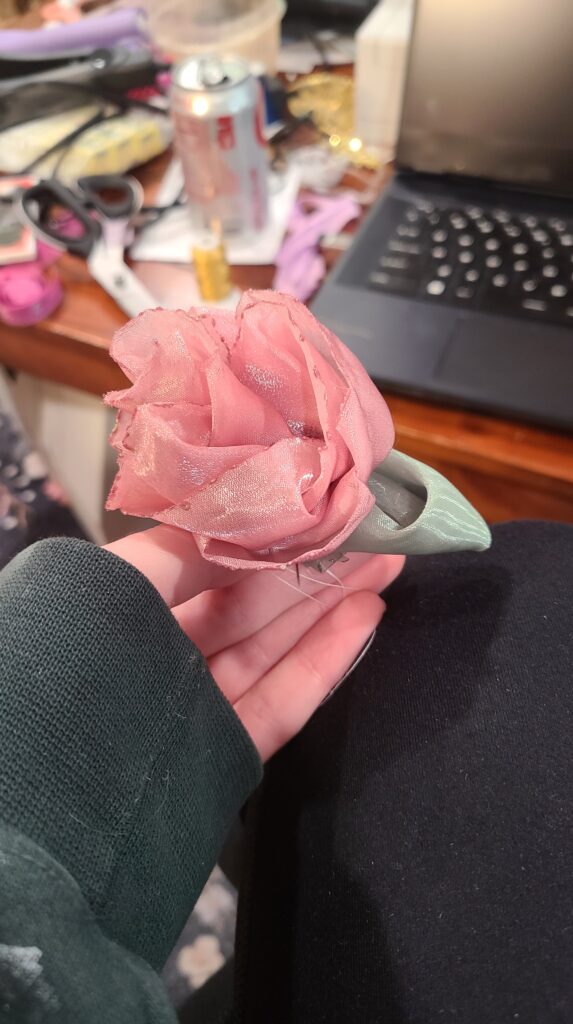
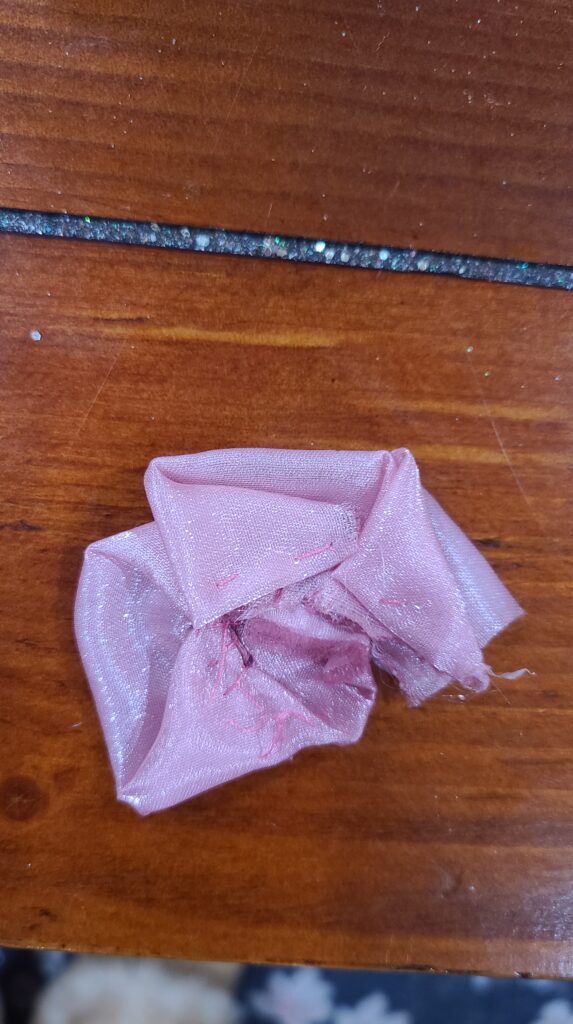
3.1 – Rosettes
I folded the rosettes using metallic organza and this method I found on youtube – 🧡TUTORIAL HOW TO MAKE EASY AND SIMPLE ROSES FLOWER FROM ORGANZA RIBBON🧡DIY ORGANZA RIBBON ROSES🧡 (youtube.com) Somehow, I’ve already lost the exact tutorial I used, but this is the same basic method.
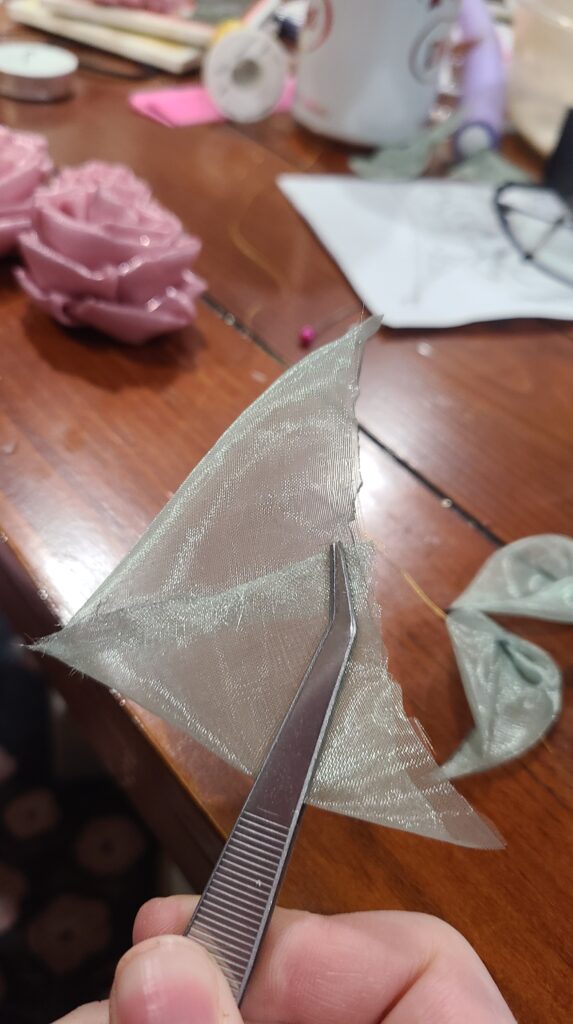
The method is designed for ribbon, but since there was no decent ribbon in anything even approximating the color I needed, I cut strips of the organza double wide, folded it before starting the rose folds, and melted the organza edge so it wouldn’t fray. The leaves were made in a similar way, and melted together to seal the two halves. Tweezers were absolutely non-negotiable for this, and I learned that real quick.
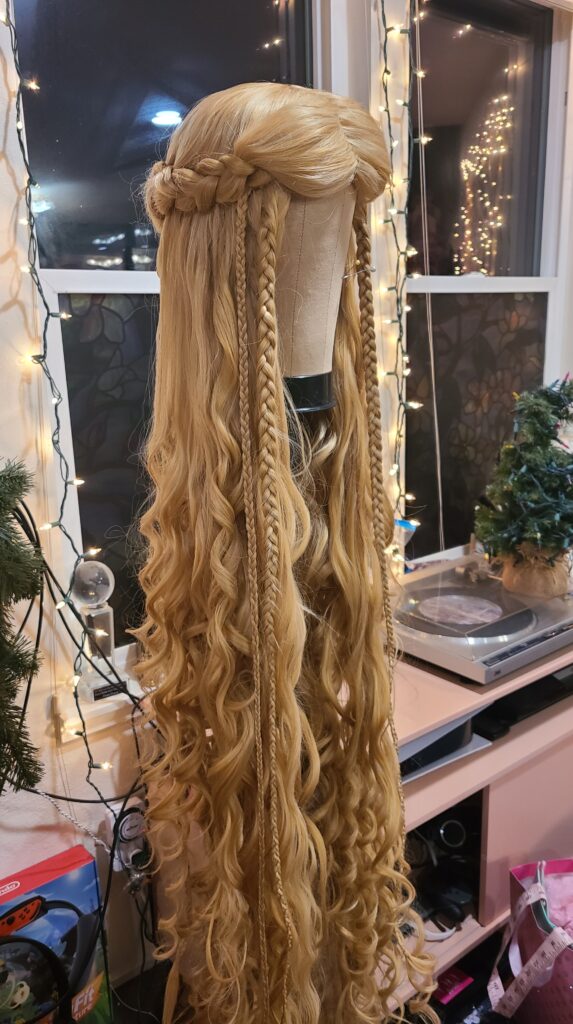
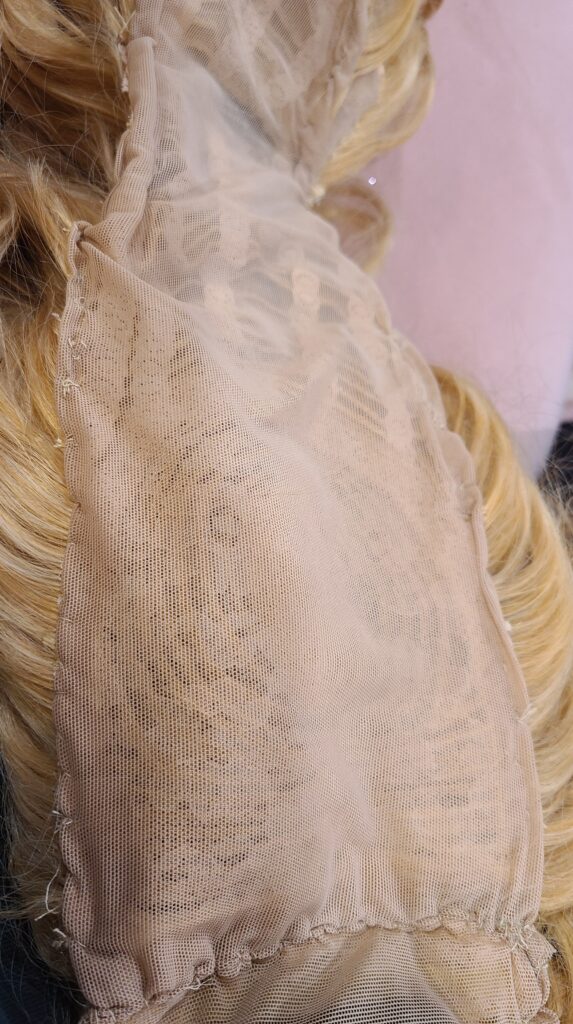
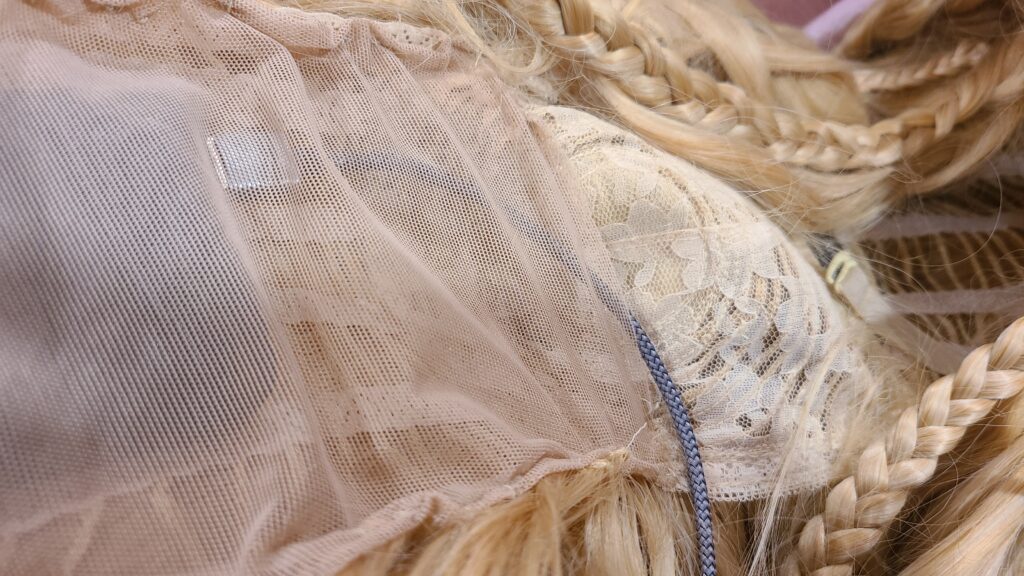
3.2 Wig
I made this wig several years ago for my Historical Rapunzel, but it needed a complete detangle and restyle for this costume, so it was still a 44 hour process to get it ready for ECCC. It’s built out of 3 Arda Ororos, 1 XL curly clip, and 1 pack of XL wefts, all in Pale Blonde.
I also learned how to solder so I could add lights into it, powered by a battery pack in the wig. The wefts are covered by a stretchy mesh so they stay clean and untangled. This wig is 5.5 feet long and curled at the ends to harmonize between the film and the concept art. The curls also help mask the ends of the shorter hair. The lights are painted with gold glitter to better hide them in the wig and give a little sparkle even when they’re off. I paid my friend Monty in burgers to teach me to solder.
3.3 Props
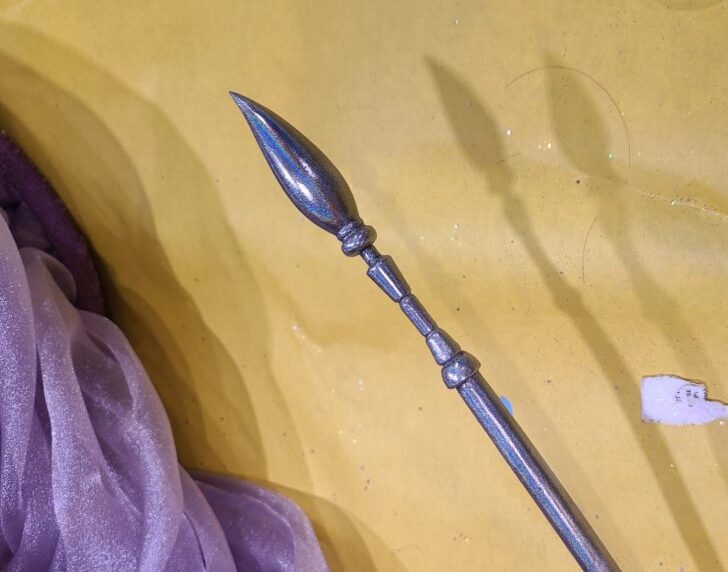
Paintbrush & Necklace –
Modeled in Fusion 360 and printed in resin, then finished with chrome nail powder. Pro tip: if you’re going to finish something with chrome nail powder, it absolutely needs a top coat. The brush had a dark spot immediately. It also broke about 2 minutes after I went off stage, which was pretty expected, honestly – such is the risk of a super thin, unreinforced resin print. It got the job done, but v2 will definitely be better.
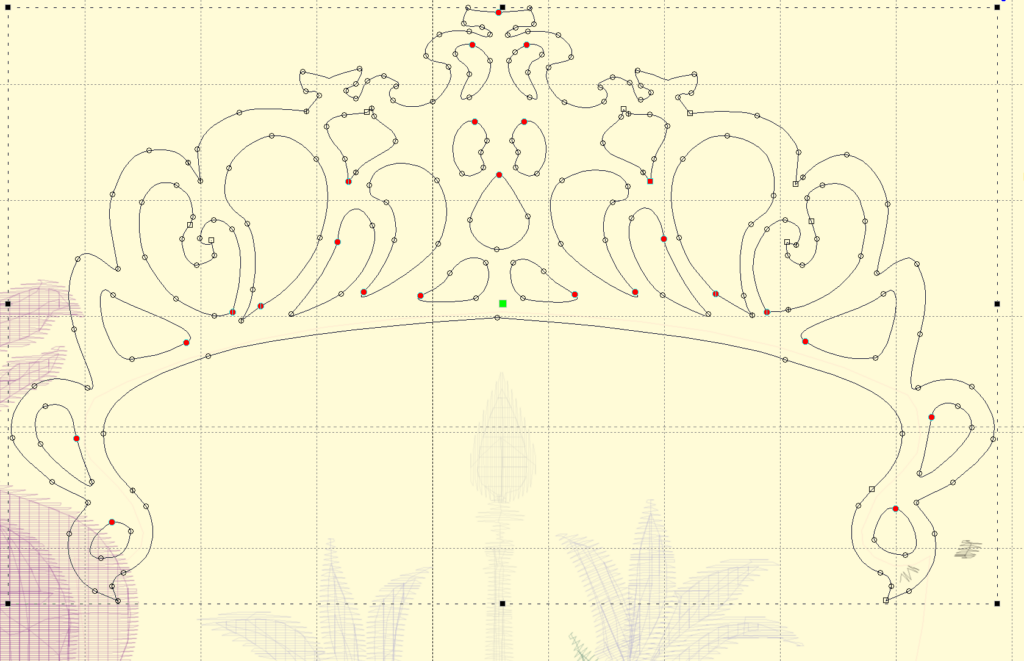
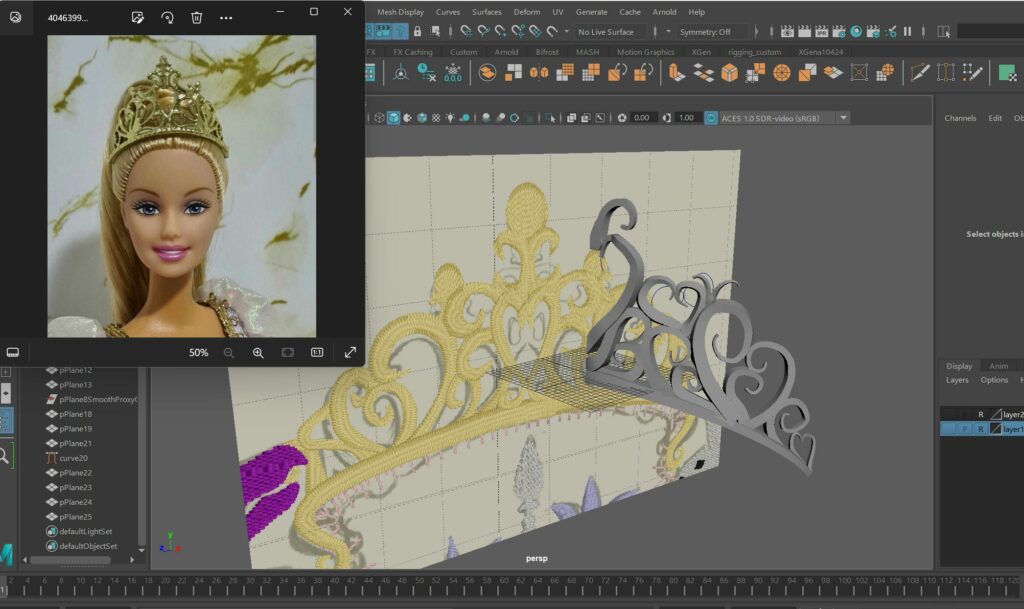
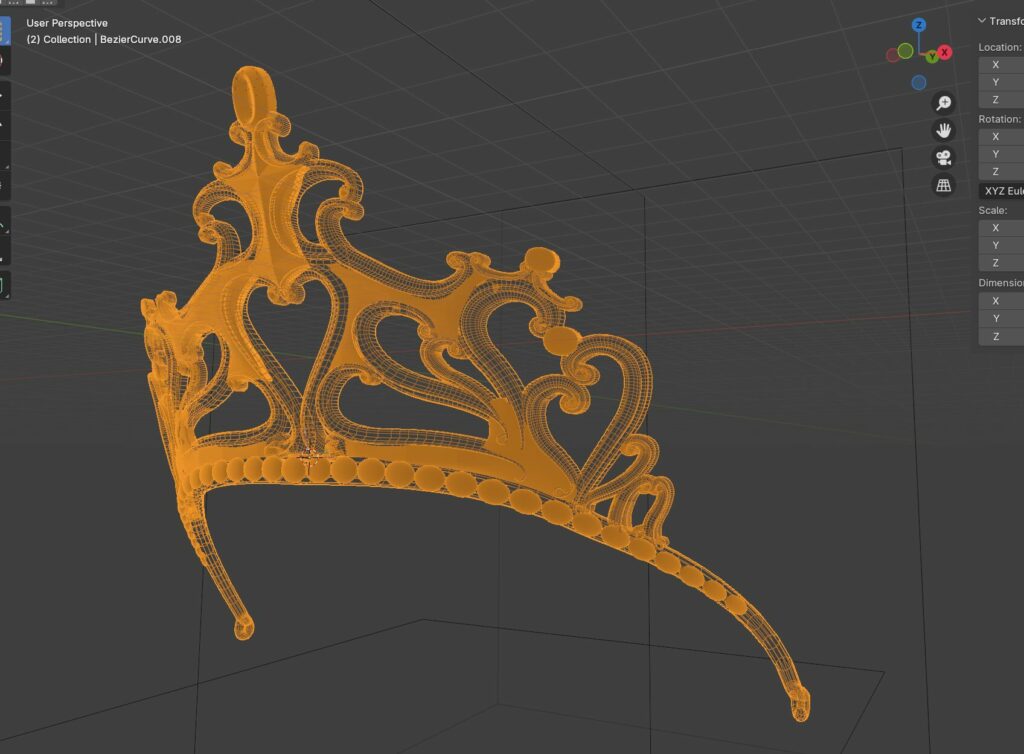
Crown –
Modeled in Blender, resin printed and finished with chrome nail powder. This crown was an ass to model. Every single piece of art had the crown rendered in a different way, and it’s the worst combination of hard surface and big swirly modeling. I tried about 4 different modeling techniques and 2 different softwares before I settled on a “Good Enough” version. Even my coworker, who does 3D modeling for his entire job, grimaced when he looked at the reference. Once it was spray painted, it got sewn into the wig for security.
I might try to remodel this in the future, but I can’t say it didn’t do the job.
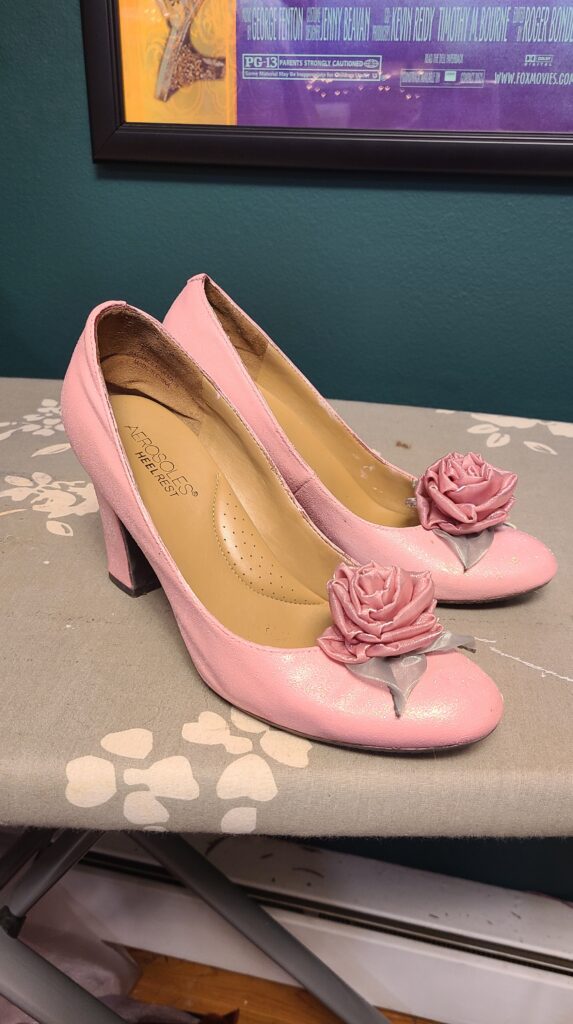
Shoes –
These shoes are my favorite part of the entire dang costume. Super simple process, just Angelus leather paint and a little glitter.
Final Touches:
The night before con, I slapped a bunch of fabric mod podge on the sleeves and the edge of the overskirt and sprinkled glitter all over them.
No regrets. It’s fucking magical.
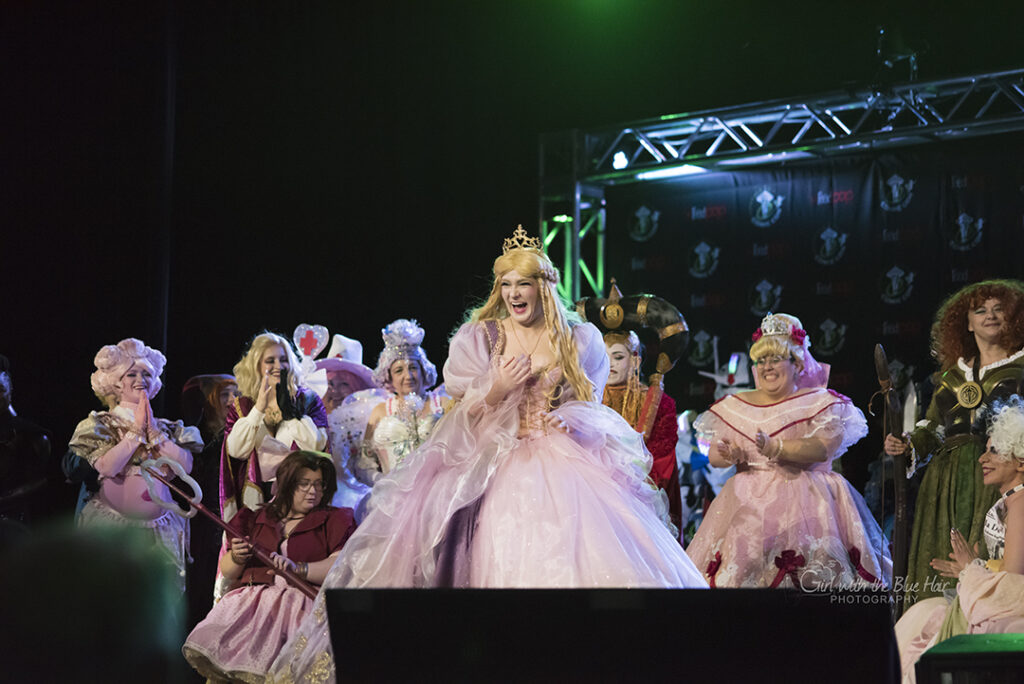
I’m really proud of this costume, but more than that, this cosplay and the competition experience really solidified how incredibly lucky I am to have the friends I do. I have never felt so loved and supported as I did during this entire build process, and I didn’t even step offstage before I had people running up to me screaming in excitement. I have never felt so loved and supported, and I hope I can do my part to return that energy back into the community <3 Somewhere in the back of my brain, I made this dress because I wanted to prove to everyone that I belonged with my friends, but the entire thing just reminded me how silly that train of thought actually was.
I’d be here for another 5000 words if I tried to thank every single one of you, and y’all know who you are, so here’s two I want to especially highlight:
@stephpipercosplay, who literally became my editor in chief between the feedback on my application and the depth of crit she gave my build book – it’s silent work, but those two things are the most important parts of the competition, and no one ever sees them but the judges!
And, as always, a forever thank you to @goodgreyciouscreations. He was, as he always is, an absolute rock.
Leave a Reply